|
Thetoysurgeon, OSW member
I remember
getting my first GI Joe and especially going to the store on my birthday to get my first German. I remember an entire
isle at the store being crammed with GI Joe stuff. At that time, we had not seen such detail and accuracy and it captured
my desires. Nowadays, with detail and accuracy so much desired by collectors, companies like Dragon and BBI have provided
what we want. In a way, even Ultimate Soldier is better than the original GI Joe. Customizers have gone even further
on detail and accuracy of figures, equipment and vehicles.
When the James DeSimone Hetzer came out I bought it immediately
because I am limited by cost and 1:6 scale vehicles are hard to come by. My hats off to James DeSimone for providing
us with inexpensive vehicles. Although not fully accurate, the Hetzer gives us a platform to make it a truly detailed
and an accurate piece. I propose to "JD" to make more vehicle shells as kits so we customizers can do our stuff.
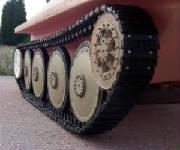
When
I look at the Hetzer the lines are all there. The gun mantle and running gear need the most work. The tracks will work
but they are not accurate. I decided to start modifying the running gear first. Instead of making 8 individual
road wheels and 4 sprockets and idlers, I made a modified model of each so I could cast them and reproduce them as many times
as I wanted. I use smooth-on products.

I disassembled
the Hetzer in all its components. Took a road wheel, and removed all the nuts with a Dremel using a sanding drum and
cutting bit. I built up around the center hub with Squadron white putty and sanded it convex to the edge so that the center
of the road wheel has a rounded bulge extending from the outer edge to the hub. I used SgtRandune's hints on the rubber
pipe connectors. I cut the road wheel in half and added the rubber around the road wheel, extending the diameter almost
a full 1/2 inch. The width or thickness of the road wheel is about 1/2 inch. I modified the angled lip of the
stock wheel with liquid plastic, sanded it down flat, predrilled holes centered around the rim at 22.5 degree increments.
I glued brass rounded head nails in the holes with crazy glue. I cut a piece of styrene round to cover the hub and glued it
into place. I used hexagon strips of styrene cut to 3/32" for each nut and glued 16 around the edge of the hub. Note:
it is good to use a compass and protractor to make a template on paper. I used it on all nut/nail placement. I cast
it and you see the result.
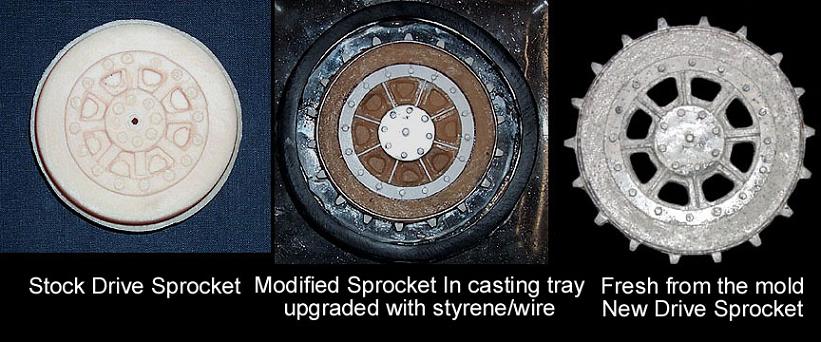
The stock drive sprocket was ok but incomplete. I cut the stock sprocket thin, added
teeth and modified the center, then made a cast...you see the result. I will keep kanowarrior updated when I complete
any future steps.
Custom Parts Available thru The Toysurgeon
All are urethane resin.
|
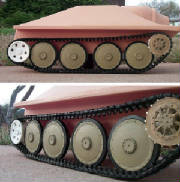
| The running gear and tracks |
|
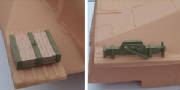
| The jack and block set |
|
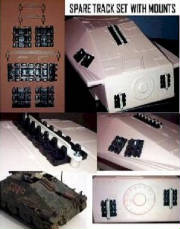
| The spare track set |
|


