|
I haven't made custom weapons for a long time. Part of the problem
is eventually 21st, Dragon or some other company would make the weapons I needed after I went to all the trouble to make my
own and it would most likely be cheaper and more uniform looking than I could do. Well, with my work on Adventure Themed
figures this was soon to change.
After spending an afternoon wading thru parts bins at the Weekend Of Heroes convention I came up with
exactly one Adventurer rifle. I like the early 20th century kitbash/customs and new sniper rifles just wouldn't work
for this. So after a couple more weeks of surfing the web and finding nothing I decided to try making my own rifles
again. And if another company finally makes these rifles again, who cares! I will probably buy them, but I just
can't get enough of this style.
My first problem, which weapon to make? After WWI and WWII there
were literally hundreds of thousands of surplus, cheap, good quality weapons that with a little work made excellent hunting
weapons in the civilian sector. Countless Mausers, Krags, Springfields, Enfields and others were bought up and 'sporterized'.
As I had a great deal of Formative WWI Springfields, I decided this would be a great place to start.
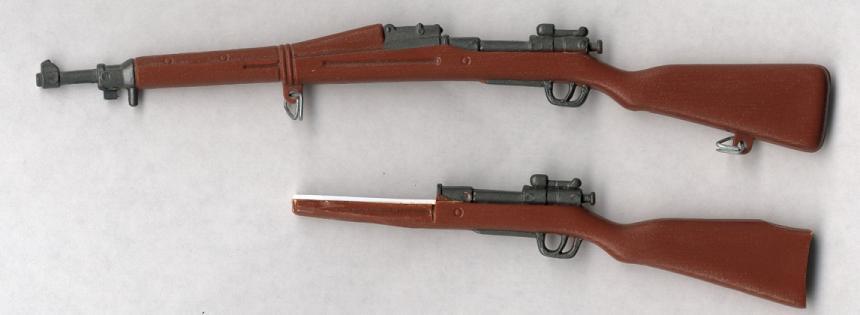
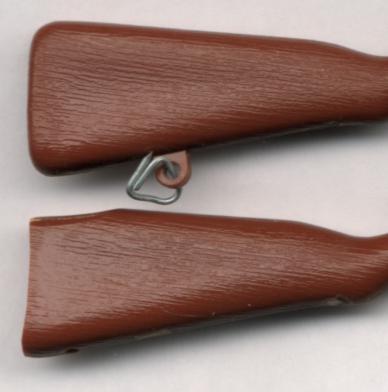
The above picture shows how I cut down the orginal SOTW Springfield with an Exacto knife and Dremel.
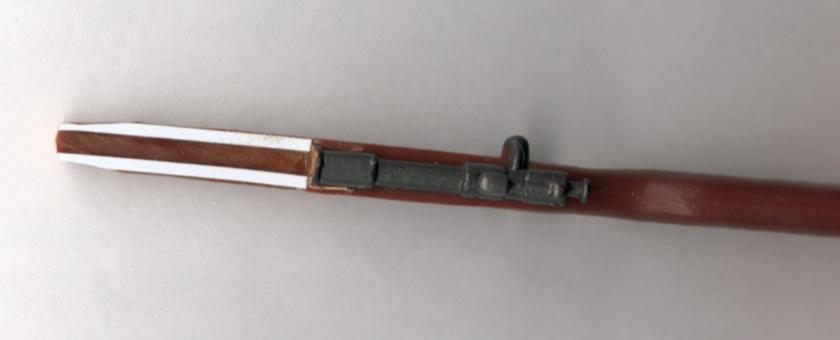
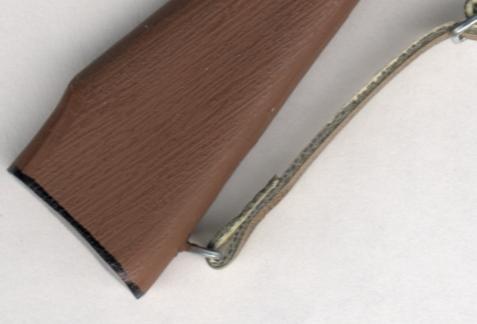
My problem is I tend to cut the stock down to far in the front so I have to add Evergreen Styrene stringers to the front to
build the stock back up. This however, as a side benefit, creates a pretty decent 'channel' to hold the barrel
in place (pic below).
Also in the top picture, I cut the barrel to far back and had to add a slight larger piece of styrene
tubing first to replace the 'chamber' of the receiver. With the bottom two rifles and in the pic below you can
see I didn't cut it back so far and preserved the original chamber.
More tricks that come in very handy. Doing carvings requires a steady hand.
Sometimes I just need to trim a very little bit off and holding the piece in one hand and the knife in another makes it almost
impossible to steady your hand. I take my small pinky fingers (Or any free fingers) from both hands and touch the tips
together. This helps steady my hands and eliminates shaking. Another tip to smooth out the carved lines is to
take an Exacto blade and run the edge at a 90 degree angle to the work and this will smooth out the carve lines. Works
faster and more efficiently with small pieces than sandpaper and will also destroy blades much quicker. I tend to go
thru 2-3 blades with each project. I keep two knives at handy, one with a fresh blade for cutting and another for smoothing
my work. Despite destroying so many Exacto blades, I am still using a box of blades I bought some three years ago!
Buying in quantity pays off.
Next I use an Exacto knife to cut the back end of the stock and then add an additional cut on the
top to give it a more 'sporterized' look. The key here is using a sharp, fresh blade when doing these cuts.
Always be very careful of your fingers, but I have found it be more likely to cut yourself if you are using older dull blades
and the cuts look very bad as well. I always buy my blades in bulk (generic brand 100 qty.) and you can get
them far cheaper that way instead of buying them in the Exacto packages of 10.
After I make my cuts on the stock and smooth them out I break off the sling
swivel attachments. I drill new holes in the stock using the tip of my Exacto knife. I put the tip on the stock
where I want to make a hole and spin the knife slowly making a nice, fast, small hole. There are better tools to do
this but sadly I don't own them. A drill tends to melt down the plastic and creat big craters. I bend new sling
swivels from paper clips and glue them in place with Zap-A-Gap (super glue). Twisting the ends of the paper clip sling attachments into
the cone shaped holes seats them better as well.
The next question is, what to use for a barrel? I found just the right material for this.
I bought a package of cheap plastic paint brushes from a craft store. They cost .99 cents for a dozen and they are made
of just the right type of plastic and give that 'tapered' look. I cut the proper length, glued a sight on the front
and then glued the barrel in place.
Unlike most military weapons, civilian rifles tend to be 'blued' not parkerized or painted.
This gives them a shine not usually found on military sidearms. I best replicate this using a Sharpe Fine Point black
marker. Be sure to do this first as with small pieces like this you will be certain to get it all over. I also
cut the tip off the barrel and using my Exacto knife I drill out the end of the barrel. Next I repaint the stock and
then use what ever black paint I have handy to touch up the barrel, paint inside the barrel or scope, etc.
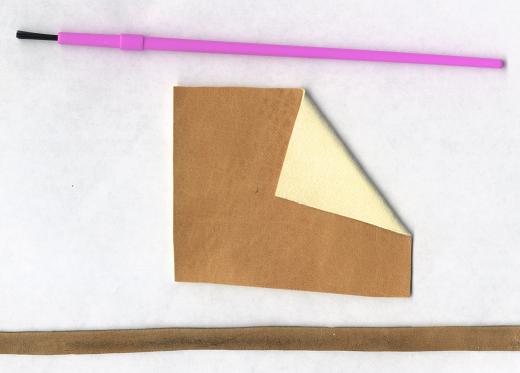
For slings I use this upholstery material that looks like untanned leather. First I cut the
strips I need then I wipe it once with black liquid Kiwi shoe polish which gives it a browish, aged look. I then make
a buckle out of paper clips and fix the sling on the swivels. Zap-A-Gap adhers to the material almost instantly
and I squeeze the bond with a pair of pliers which compresses the material into about half it's size making the bond harder
to spot.
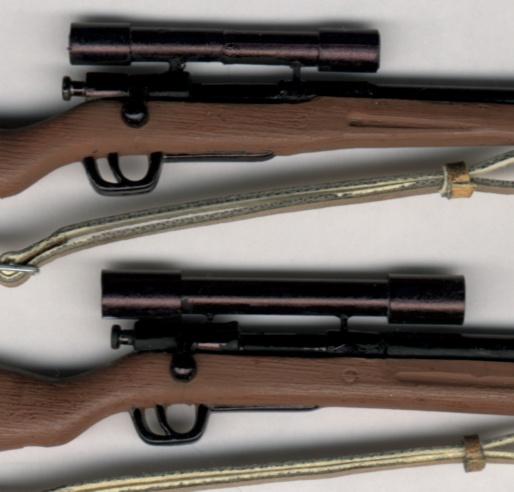
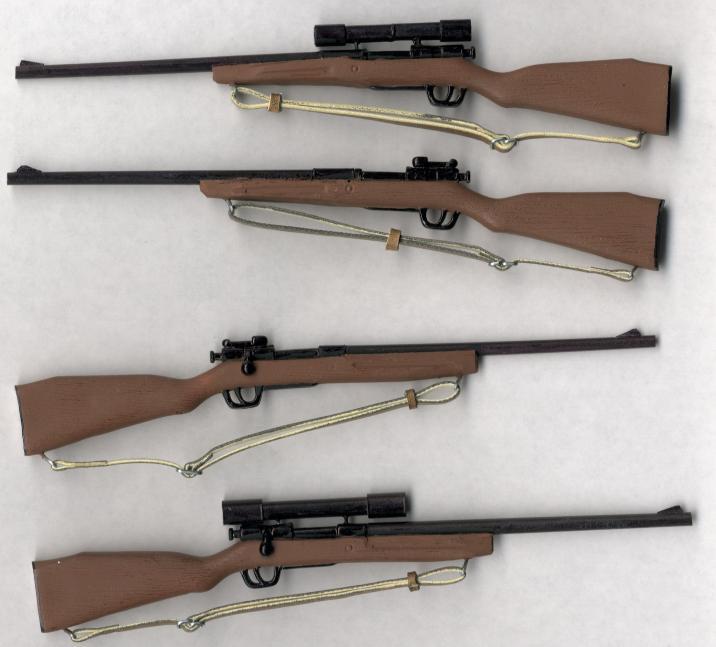
When making a scope, I start by cutting the rear sight off the rifle. In
the above picture I used two different types of materials. The top one was made from two paint brushes and
you can see the seam in the middle. A serious flaw in my make up, I tend to hate to waste material and
reuse as much as I can. The bottom scope looks much better to me. I used Evergreen Styrene telescoping tubing
for this one. I just cut the body of the tube out then added end caps. Drilled holes with my Exacto then
cut paper clips for the supports and glued them all in with Zap-A-Gap.
That's it. Each rifle took me about an hour to complete and another hour to paint and add
a sling.
NOTE:
In the first picture I like the stocks on the top two rifles better.
I think it's better to cut the slant in the bottom of the stock from the front all the way to the magazine plate. This
gives the rifle a much better look. Unfortunately when Formative made these molds they apparently didn't notice
there was a 'bend' in the middle of their rifle. The barrel does not line up properly with the reciever.
Oh well...
To see more custom weapons, click on the links below
Austrian Steyr Mannlicher M95 (M1895) rifle
Italian Infantry M1891 Carcano Long Rifle
Italian Cavalry M1891 Carcano Carbine
Italian Breda Model 30 light machine gun
Improving on Brian Vota's MAS-36 Rifle
Japanese Type 92 Heavy Machine Gun
M1871/89 Spanish (Oviedo) Remington
|