|
SgtRandune's Hetzer Modifications
Here are
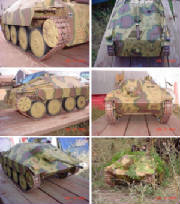
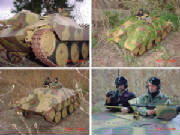
some before and during photos of my rebuild. I want to reuse as much of the original tank as I can. The
fenders are way too thick so I have been looking at ways to thin them out as well as put some angle on them. I decided
to remove the molded rivets and replace them with metal ones so when I paint they won't get lost. In the process I added
more to make it look a little more life like. I am reusing the gun mantle and I gotta tell you it actually looks terrific!!!
Lots of cutting and recessing here and I found that the gun barrel to Hasbro’s 37mm anti tank gun works great!!!!! I'll
post these photos after I get it tweaked a little bit more. I am trying not to turn this into a huge project as I am
actually hoping to finish this one!
I finally
got to mount the mantle, what a bugger this turned out to be. lots of cutting, sanding, filling..etc. And it really doesn't
look much different. I built up the lower mantle portion with sheet plastic and added the socket for the gun. Redid
the mantle about a dozen times and was able to still reuse the one it came with! I added the welded in line where the
mount would be removed from the hull. After numerous different "bondo" sessions I decided to throw a quick coat of primer
to both show what still needed sanding/filling and to boost my enthusiasm!!! Actually it’s turning out pretty
good. Lots of work ahead, after finishing the mantle up some more I get to add the fenders. By the way, since
the tank is injection molded plastic I used Urethane bumper repair filler for the big portion that’s why it’s
pink. It sticks to plastics much better than traditional bondo. Expensive though, but I don't own a body shop for nothing!
I am not
going to model the interior. I cut out the rear most hatch by mistake. Now I am stuck either putting it back stationary
or making it work when I make all the other hatches. I did buy new hinges for it so I'll probably do it anyway
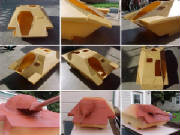
I just finished
filling all the holes I made on the front. I got the fenders perfected and will be adding them permanently tomorrow.
I am still wrestling with mantle, but should have that licked and installed tomorrow. Then I will add the finish mud
(bondo). I went ahead and cut out the intake on the rear today, I am also going to rebuild it with actual screen.
I also cut out the rear fenders to thin them out as well.
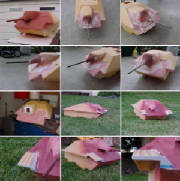
I just added
the front fenders and am putting the photos up now. As far as the rivets go they are linoleum nails (for kitchen flooring)
16x 5/8" size. No pilot holes are needed. The plastic is so stout I was able to drive them in with a hammer. They
are certainly not going to come back out again! However watch the "porcupine" effect on the inside if you put your hands
in it. Just clipped mine off around the hatches so they won't snag on the uniforms.
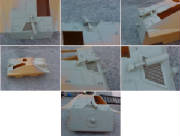
I have added
grab handles made from 1/2" cable staples, the auxiliary starter cover is the cap from an old tube of glue, and the air intake
vent is made from some small wire fencing material with sheet styrene for the case and vent flaps. The late war style
exhaust is made from 1/4" PVC pipe and copper tubing.
I decided to put the late style exhaust on mine because I am
modeling later in the war and everyone else is doing the old style and I wanted to be different!
I decided
before I can go any further I have to tackle the road wheels. Since I cannot afford to replace them with some of the awesome
resin wheels available I have to make due with the original ones. They in a word, Suck!! I just got back from the hardware
store, you should see what I have in store for them. Hope to have one of each finished by the end of the weekend to
share with you all!
I just finished
the idler wheel and found an easy solution for the main bogey wheels. The tough one was the drive sprocket, but MAN
did I nail it!!!! Its not quite finished but boy howdy I like it!!! So far total investment on these is $25.00!!!!!!
I should have some photos up tomorrow night!
I'm going to officially dub this Hetzer "Project Lowbucks"!
We will see how much I am into it when it’s through. At this pace it will be under $200.00 and that includes the
price of the tank with shipping!
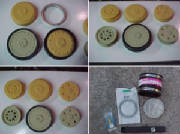
Well in
I've dubbed this "Project Lowbucks". I don't have a ton of money to spend on the upgrades so I am forced to reuse most
all of the J.D. Hetzer. It is proving a challenge to say the least, what I need or want to add are limited to both my
imagination and the hardware store! My main problem I have been putting off is the road wheels. The originals
are not really great so I had to figure out how to make them more useable. I think I got it pretty darn good!!
Still not done more sanding and filling to do not too mention 9 more wheels!!! Talk about tedious. I spent time
roaming around Home Depot looking for something to jump out at me. I ended up getting a 1/2" PVC pipe for a spacer,
a tin 4" vent for heating ducts, 4 sink strainer brackets 4" in size, and the biggest score is I found a section of rubber
pipe used to section in 4" sewer pipe.
The rubber pipe is cut in 3 pieces that will serve as the rubber "tire" around
the main wheels. The best part besides looking great, is that it adds 5/16" in height. This will allow me to move
the wheels up on the hull to look more scale without sacrificing the overall scale height of the tank. Since they are
now thicker I can space the wheels more appropriately to where they should be in 1:1 scale.
The 4" tin vent was trimmed
out to resemble a trim ring on early Chevrolet Ralley wheels! This adds a VERY convincing rim to the main wheels, which
it desperately needed.
The Sink strainer rings worked perfectly to make the drive sprockets. The center portion of
the molded drive sprocket provided with the JD Hetzer looks good. So I cut it out and centered it in the strainer ring
epoxied it in and cut out the center spokes. This was repeated for the second half or back as well so it gives it depth.
I am going to be adding the teeth to the sprocket to correspond with the treads. I think it’s coming along
nicely! I used the PVC pipe as the spacer to hold the two together.
On the rear Idler(?) wheel all I did was
cut it in two halves and add a PVC spacer as well. I did drill out the holes and this makes it look a ton better. I
am still not convinced this is the finished product but for now it will be.
I added the Linoleum nails over all the
molded nuts to give them better distinction once it’s painted.
As soon as I get the rest of the wheels finished
I can start figuring out where to correctly mount them and adjust the ride height of the vehicle correctly.
Overall
I am very happy with results as I was very worried that all the work I was going to would be ruined in look by the stock wheels.
Kinda like Cinderella getting dressed up for the ball wearing worn out sneakers with the gown!
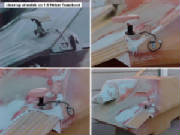
Well I haven't
gotten much done since I did the left side wheels. Still have to do the right side but I wanted to tackle something
different. I turned my attention to the front Notek Lamp. I decided to make my own in trying to keep within the
theme of Project Lowbucks. I made it out of a 1/4" PVC pipe end cap. I think it turned out pretty darn ok. " Inside
the Great Tanks" of a Notek mounted on a restored Hetzer.
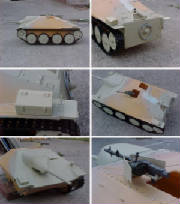
Well I took
a breather for a while, ok actually my wife made me take a break! I did finally get back to it so here is an update
on what I have accomplished so far!
I finally
got the wheels mounted where I wanted them. I am using the CajunGIJoe's method of installation. I still haven't
got around to finishing the wheels for the other side. I wanted to get the axles installed first. Or at least
that’s the excuse I am using. You can see the fender extensions I made. I also made a tow cable and
mounts for it. I added rear tow points as well.
The toolbox
on the left rear fender. Thanks to Treadhead99 for providing the measurements. Overall top photo and front so far showing
the banded wood blocks for the jack mounted on the right front fender.
My MG34
machine gun mount. I decided to be a little different and remove the butt stock on mine. It was a common practice
since it was in the way when using the hatch. It was designed to be fired internally using a periscope system. Also
notice the tie downs I added. They are from dollhouse cupboard handles. Up next are the side skirts and periscopes.
Then I will have to tackle the hatches. I am also going to make some extra track links for the back.
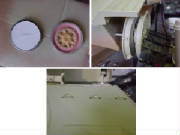
This the
main drive wheel for the right side. Basically I split the stock wheel with a Dremel then cut out the center of both
the front and rear of the wheel. I glued sheet styrene to the bottom of the sink strainer retainer for a backing.
Then centered the cut out portion of the wheel and glued it in. I then used bondo to fill in the edges. Next step
will be to drill out the spokes and ream them into shape both front and rear wheel halves so it looks more real. The
two halves have been glued together with a PVC 1/2" pipe spacer.
The tie
down hooks were in the Dollhouse section of my local hobby shop. They were used for cupboard doors and chest of drawers.
I think they look pretty decent. I used small nails to look like bolt heads to hold them on. BTW: in the
upper left corner you can see a sneak peak of the jack I built for the right rear fender. more on this later!
I found
the perfect hinges. Square with only two bolt holes per side just like the 1/1 originals!! They were also in the
Dollhouse section, made of brass and best of all only .49 cents for a pair!!!
|


