|
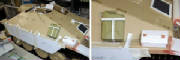
First, just
let me say, if you don't want to cut all the hatches out, DON'T (it gets kind of tedious sanding all the hatches, hinges,
frames, drilling new holes, making sure the hatches line up, etc...)! The only
reason I did was so I could have access to the engine grate. Which I wanted to
replace with a new styrene frame and a box with louvers. Now with all this open
space, I'm trying to figure out how to get some basic bulkheads in to separate the fighting compartment from the engine compartment.
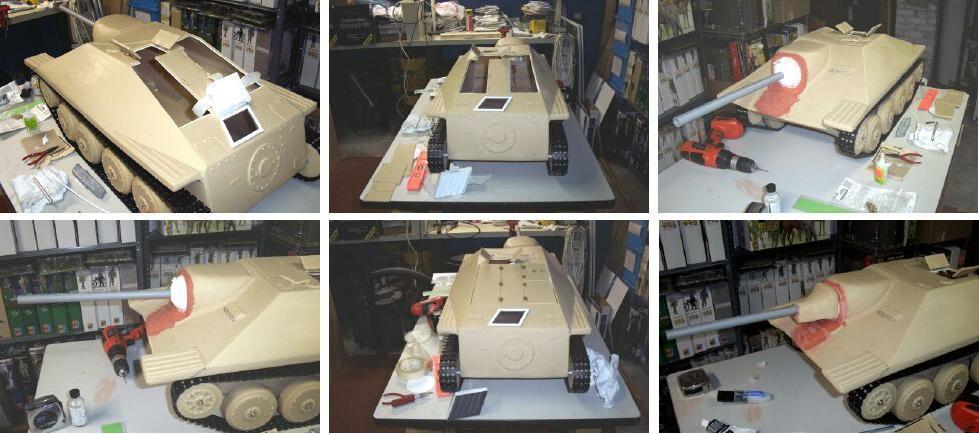
Now the question of questions. What
to do about that gun mantle? Well, ToyKing was close with the foam ball. It's actually a wiffel ball. I cut some
of the back of it off so it would fit, then cut a sheet of styrene to cover the opening on the tank. I cut a hole in the styrene piece a little smaller than the ball and epoxied it in place. I'm sure I could have made it so the gun could move up and down and side to side, but I'm only planning
to display this piece so I didn't want to put the extra time into it. My idea
if you want a moving gun barrel is to build a styrene box slightly bigger than the ball and attach rubber washers at the points
where the ball would touch. I'm pretty sure it would be pretty durable and give
the gun a full range of motion (just an idea). Once I installed the ball/styrene
assembly, I was having a problem with gun barrel droopage(?). My answer to that
was to get the gun in the position I wanted then filled the inside of the ball with expanding foam insulation. Other than the front plate, which is just styrene filled with model putty. The only other modification I've done so far is CajunJoes Axle modification which was a breeze (THANKS!!!!).
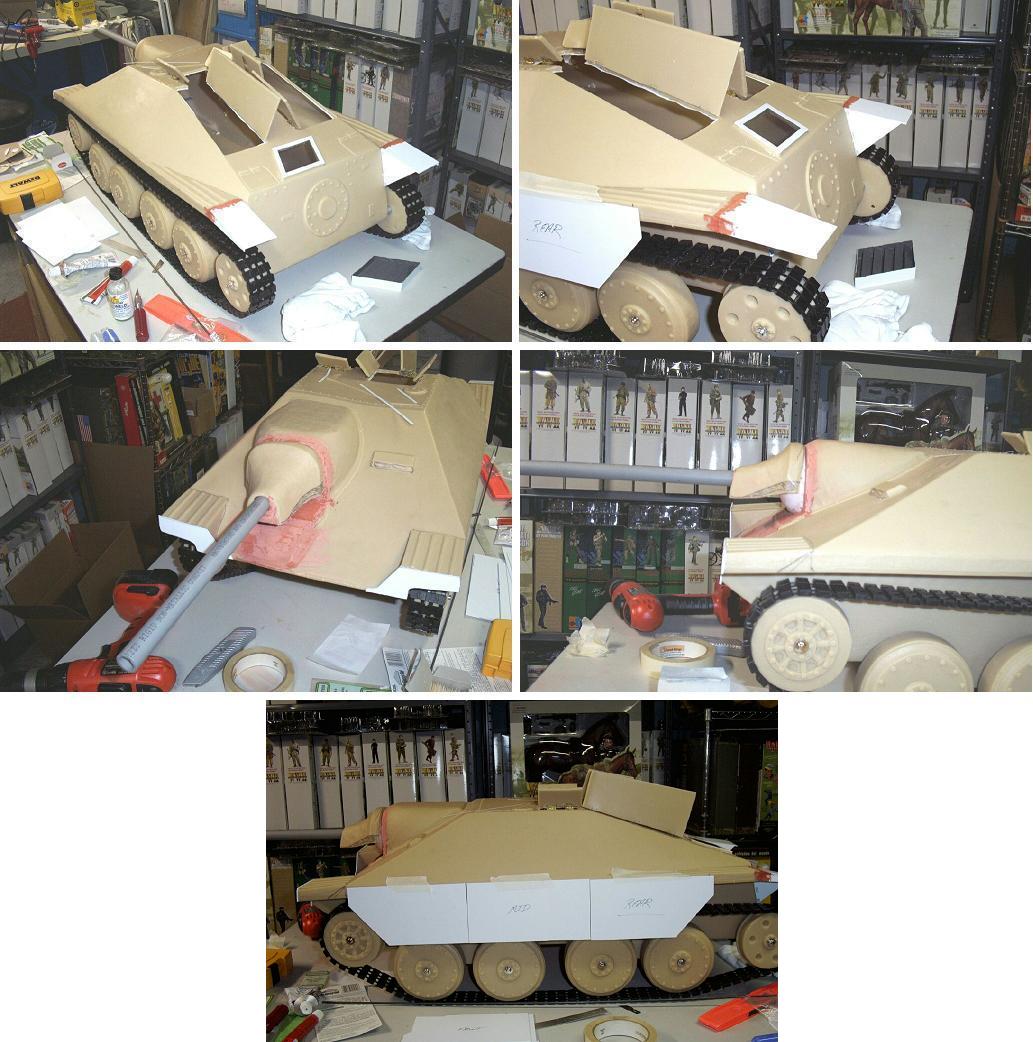
I have another
3 parter for you. The pic attached to this e-mail is of the side skirts I've made. I taped them to the tank for this pic just
so you can get an idea of them. I still have to get to the hobby shop to pick up the plastic I need to make the mounting brackets.
I don't plan on actually mounting these till I have the base coat of paint on the tank.
Here is
the second part of what I accomplished this weekend. This is the rear of the tank. I really wasn't crazy about cutting all
the fenders off and rebuilding them, so I decided to take a short cut and see how it came out. I basically added a 2 and a
half inch of styrene and some braces to the back of the existing fender. I puttied them up and they just now need a sanding.
Here's the last set. I'm not sure if this is going to stay or
not. As I said in my last e-mail, I was looking for a way not to have to cut all the fenders off and rebuild them. This is
what I came up with for the front of the tank. I cut about an inch and a quarter off each fender. I them made a piece of styrene
to resemble the most forward brace on a real Hetzer fender. I think it looks just OK. I'm not sure if it'll stay or if I'll
end up cutting the whole front of each fender off and rebuilding.
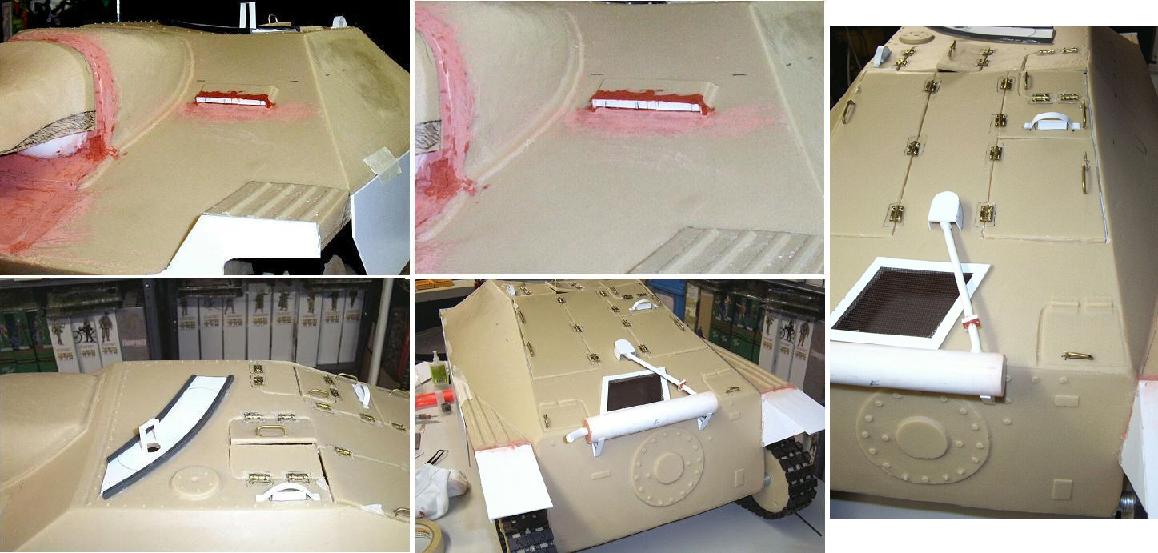
Here are
2 pics of the reworked drivers periscope slot. I really liked the shape of the one that is on the tank but, the front
of it was sloped (due I'm sure to the molding process). Basically, I cut the slope out so the front was smooth.
On a small piece of plastic stock. I framed out 2 periscope vision slots and attached it to the tank. From there, I just did
a small frame of plastic stock to give it a visor effect then puttied to marry the new assembly to the tank.
Here's the
muffler system I decided to use. I just bought the new Osprey book on the Hetzer and found out that this type of muffler
system was quite common. So, I decided to go with this type. The muffler is built from 3/4 inch PVC. The
rest is Styrene tubing that I cut and bent. I also couldn't find a good pic of the support system for the muffler so
I sort of ad libed it a bit and built a triangular frame for it to sit on. I'm pretty pleased with the way it came out.
Here's the
last part of what I got done this weekend. The first pic is of the top of the tank. I reworked the gun aiming
sight fixture. First I cut a piece of plastic the exact same size of the slide that's on the tank. I then cut a second
that was smaller and had rounded ends. I then drilled a hole for the sight (which will added after painting), and made
a frame from Styrene sheets. You can't see it but I also put a tub under the hole that the sight will sit in.
Also on this pic, you can see the side periscope which was made from plastic sheets. I also finally got around to making
and adding all the handles for the hatches.
The second pic just shows the rear of the tank with all the handles attached and the commanders rear facing periscope
(now I just have to build it bottom of the periscope so I can leave this hatch open).
I wanted
to put some sort of bulkheads in the tank just to divide the fighting compartment from the engine compartment. I've
been making WAY to many trips to the hobby shop for plastic so I decided to cheap out. As I'm not detailing any of the
inside of the tank, I just used cardboard sheets trimmed out with plastic strips (to dress them up a little). I figure
once I spray them with interior buff, you won't be able to tell their cardboard.
Here are
3 pics of the remote MG. There are 2 pics on the one I made for the tank, the other pic is the page from Schiffer's
book on the Hetzer. Mine isn't exact, but it's OK for me. It's made from plastic strip and a piece of plastic
tubing. I then ran a small piece of brass rod through the assembly and through the roof so it can rotate. Here is a pic of the Nortek light that I've installed.
I cut a piece of plastic tubing then added the Nortek which was stolen form a 21st Kublewagon. I also added the attachment
point on the side of the hull. Still need to add the wire.
Next pic is of the hull tie downs. These were made
from 1/2" Bostitch staples. I twisted the legs of the staples inward then bent the top of the staple. They were
attached with Milliput epoxy putty. Weld marks were added to the putty while it was still soft.
Here is a pic of the tool box that I built from plastic card
and doll house hinges. Also on this pic, you can see the Jerry can holder that I added to both sides of the hull. I
didn't plan on adding tools because I could only find one set on line and it was $45.00. I tried to fashion my own but
that was just a waist of time and plastic. So, I thought this was a good alternative.
The last pic is a shot
of the side skirts with the mounting brackets attached. Once the base coat of paint is put down, I'll attach these to
the tank for the camo to be put on. Also, I tried to size out putting the rubber rims on the road wheels ALA Sgt. Randune.
I don't think I'll be able to go this route because I've already done the CajunGIJoe's axle upgrade. The road
wheels will be rubbing together. I thought about busting the whole thing apart then I can to my senses). The road
wheels may stay as is with just a paint job or I may try adding the rubber rim using a combination of sheet plastic and putty.
The paint
is taking me a bit longer than I expected. I'm using an Epoxy Almond paint as a primer and I'm doing it in light coats to
try and keep it even. So, in the mean time, I figured I send you a few updates with how I finished the conversions I made
to the tank.
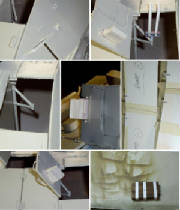
The first pic is of the antenna mount. This is pretty straight forward. I just cut a piece of plastic
tubing on an angle to match the fighting compartment then capped it and added a smaller piece of tubing to eventually hold
the antenna.
The next 2 pics are of the commanders inside rear facing periscope. I had always planned on leaving the
large commanders hatch open, so eventually, I had to tackle this. It's completely built from sheet plastic.
The first
pic is of the swing arm mount for the commanders forward looking split periscope. This was made from brass and plastic rod.
To attach it to the tank, I cut 2 small blocks of wood. One for the top and one for the bottom. I then drilled them the size
of the main rod. I them assembled the whole unit and fixed it in place with a 2 part epoxy. The second pic is the same unit
but with the split periscope attached. This was built completely from plastic sheet and plastic tubing.
The fist
pic is of the read deck. I decided to dress it up with an auxiliary starter cover. I couldn't find the correct shape and after
many attempts, I settled on a basic round shape. This is actually the top of a bottle of Zap-A-Gap. I then started looking
through my parts box for something that might resemble track holders. Then I came across a couple of 21st Century MG 34 round
magazine carriers. I cut them down and cleaned them up and epoxied them on. I think to the untrained eye, they look pretty
good.
The
second pic is of the rear tow attachment. This was made from sheet plastic.
The
third pic is of the front tow attachment and this was made from sheet plastic as well.
The first
pic is just a shot of the side shields off of the tank while I'm priming it. The reason I took this pic is because I found
a pack of 4mm GOOGLE EYES at my local Michaels (crafts place). They're about the right size for rivets and they came 400pcs
for $2.99 (good deal). Once painted, you can't tell that your tank is looking at you (LOL)
Last pic is of the wood
block assembly that'll be on the front fender. The wood is strips of bass wood cut to length and stained. I then made 3 bands
of plastic strips to go around them. The bands will be painted with the tank and the wood will be added after.

Well, the
initial ambush pattern is on the tank. For being the first ambush scheme I've ever painted, I think it came out pretty good.
I ended up using Testors Enamel Model Master paints. The colors on the tank are as follows, #2095 Panzer Dunkelgelb 1943,
#8017 P. Schokololadenbraun 1943, #2097 Panzer Olivgrun 1943. I first sprayed the 3 color camo over the tank then made a template
from a 3 X 5 card with some shapes cut out for the leaf pattern.
The Decals are from John's Stuff which are nicely
done and easy to work with.
I'm, guessing I have another week worth of detail painting and weathering. Then I can start
on the crew.
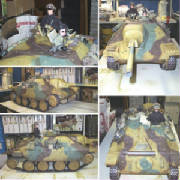
The commander is Oskar (of course). He's wearing a Major
Midnight crusher. The jacket and sweater are the same that he comes with and I added Max's heavy weather pants.
The loader is a 21st century Police sniper figure. I always liked this figure because he looked good with and eye patch.
Boot 25 did an awesome repaint on the face. He's dressed in Oskars camo jumpsuit & cap.
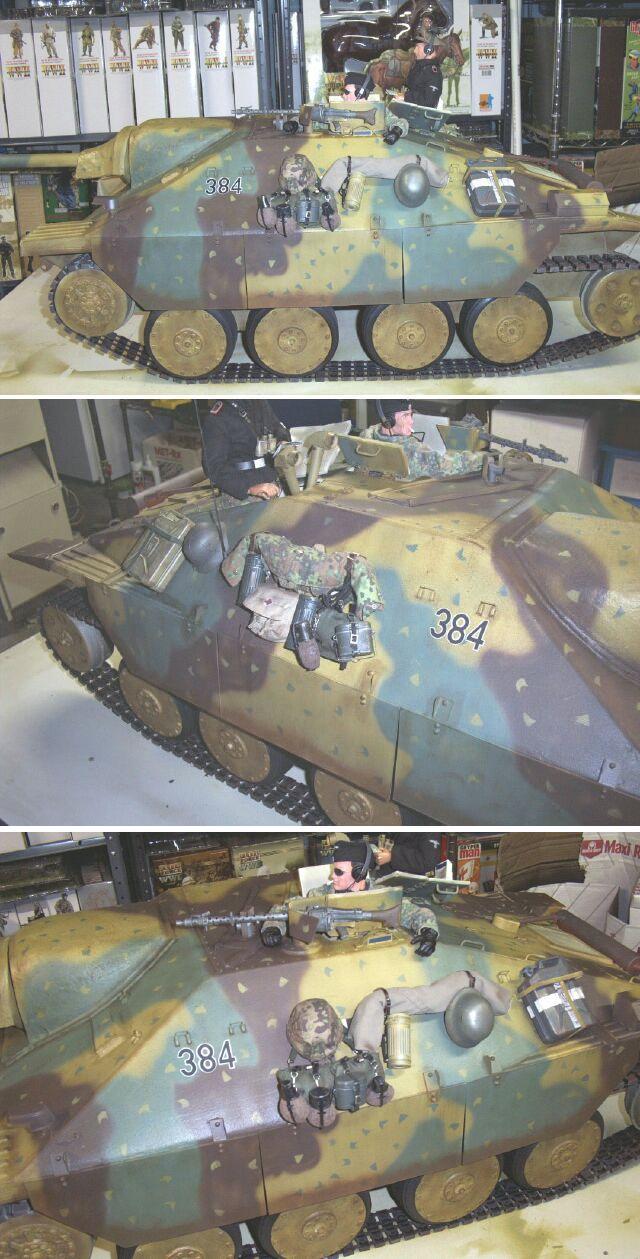
Picture of each side of the tank with the stowage that
I added. On one side a have a rolled Zelt and on the other is a rolled cape from Misha. I did come up with a good idea
for the rolls. I rolled a piece of aluminum foil inside each. Once you have it on the tank where you want it,
you can mold it into any position you want and the foil will hold the fabric in place. I also made straps for the breadbags
and flocked the canteens.
|


