|
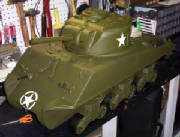
Keeping in mind this is a low budget project for the winter. I used brass to make the lightguards on the frontend. I
sliced into the plastic with an exacto knife and using a vise-grip pliers, pushed the brass into the slots for a very tight
fit. No glue was used. I made brackets for my tools by cutting plastic tubing to size and slitting it on one side, then using
a small screw to attach it the rear deck. I salvaged lights off an old Hasbro Greyhound Scout Car and tail lights off a TUS
HumV. I just drilled holes in the body of the tank and slid the lights into place.
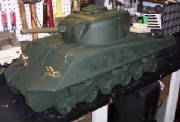
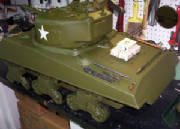
I took the advice to use Krylon primer first (1 can) and then sprayed 3 cans Testors Dark Green over that. I've detailed
my rollers, engine vents and machine guns with a small bottle of Tamiya flat black (used nearly the whole bottle).
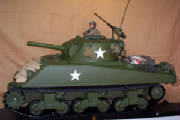
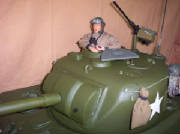
I also salvaged a couple radio antenna off that scout car and used a thin screw, up through the bottom of the turret
to attach it. A plastic tube was cut to size and a bolt run up from the bottom of the turret to hold it in place for the machine
gun mount. The tools were bought extra from 21st Century Toys, several years ago. The cargo net is fish net from Michael's
Crafts The 30cal machine gun mount on the gun mantle is the tip off a BIC (long reach) lighter. I used a neck post from a
broken TUS, SS body for the forward machine gun and the barrel off an old SOTW 30cal. Hot melt glue is my glue of choice and
holds the machine gun barrel in place. I just used the hatches and wires provided with the tank. Large industrial staples
were used to make handles for the hatches. I just used the exacto knife again and pushed the staples into the slits with the
vise-grip pliers.
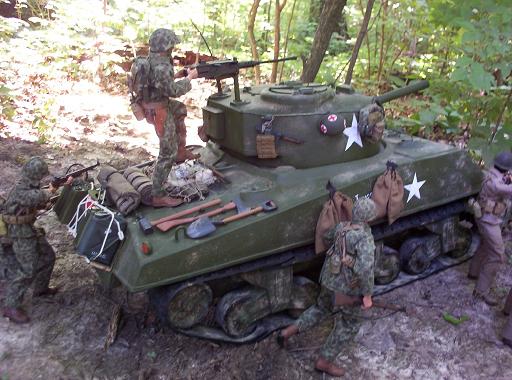
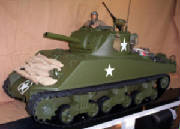
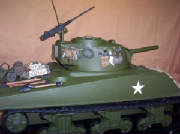
This tank changes by the minute. Literally !!! I've added a shelf to the ass end and have gas
cans and ammo cans stored on it. C-Rations are netted to the rear deck. All my flat black detailing is done.
The rear rollers are now on and I'm starting to get my front sprockets mounted.
I paid $50.00 for my Sherman and have added another $20.00 worth the paint, brass and hardware to it.
This has been a nice, inexpensive, winter project.
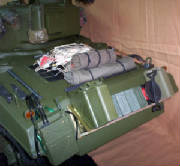
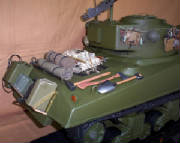
I'm gearing up the Sherman, bit by bit. Ammo cans, gas cans, field radio, tarp, blanket rolls
etc....... I added a shelf to the front and have it sandbaged across the frontend and forward machine gun.
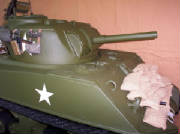
This thing just keeps looking better and better. If it hadn't snowed last night, I would have taken it outside for a
couple more pictures. I've even kitbashed a tank commander this morning. I need to paint the brass shelf brackets,
before I forget about it.
Finally getting the tank painted and gearing it up is the most fun. Seeing it all come together.
I am basically a 21st Century Toys collector but I do have some SOTW, BBI and Dragon.

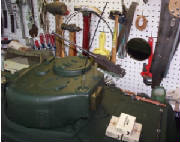
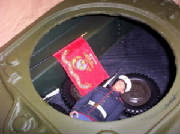
This is the final batch. I'm using the turret to store the water cooled 30cal. machine gun and 60mm mortar for my PTO Marines.
Then below I took a piece of plastic corrugated and cut it to size and screwed to into the bottom of the tank hull for additional
storage. For right now I have some wheels and tires off an old Hasbro Greyhound Scout Car, an SOTW figure dressed in a Vintage
Hasbro Marine dress uniform and a USMC flag. In the future I plan to see how many of my PTO Marine will fit into the hull
for storage.
I guess I better vacuum out the turret of all the plastic shavings.....
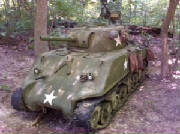
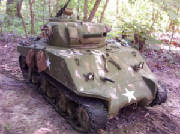
It finally dried out and I had a chance to get outside and get some pictures of my JD Sherman.
|