Making Patches and Insignia
Home | 1/6th Vehicle Projects | Photo Stories and Dioramas | James DeSimone Vehicles | My Custom and Kitbashed figures | The Armory | Dad's WWII Pics | Related Links
ACTION FIGURES AT WAR

Creating Italian Patches and Insignia

Tools and Materials
 
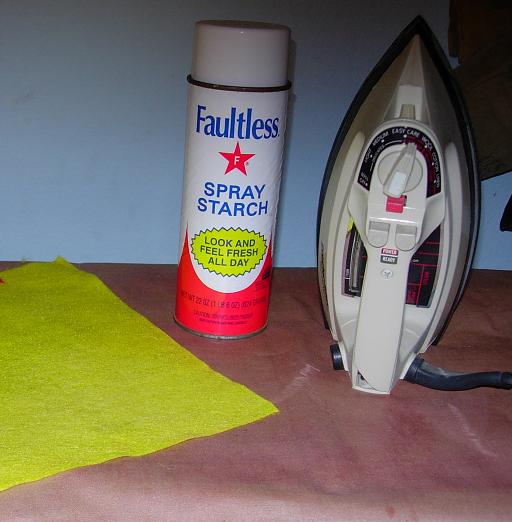
A lot of Italian patches were made from wool or used wool material in them.  To replicate this I used readily available craft felt, starch and ironed flat.  Some felt required several tries at starching some came out pretty nice on the first try.  What this did was make the felt much flatter and easier to work with as it became almost as stiff as cardboard and easily cut with simple scissors.
 
Other materials widely used in Italian patches were metallic threads, but I didn't need any for these projects. 

Click on picture for larger image

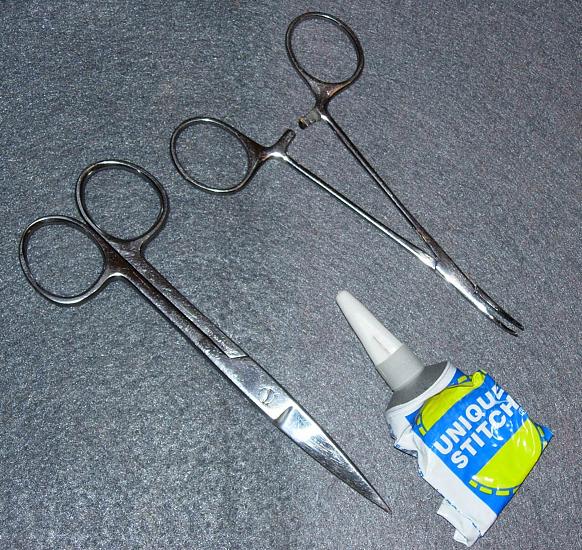
Some simple tools I used.  Surgical scissors, hemostats and fabric glue.  I really like using this glue for fabrics.  It bonds fairly quickly, Rarely leaves any residue and is very similar to white glue so it isn't toxic nor will it glue your fingers together.  I actually prefer this type of glue over Fabric Tac.

Click on picture for larger image

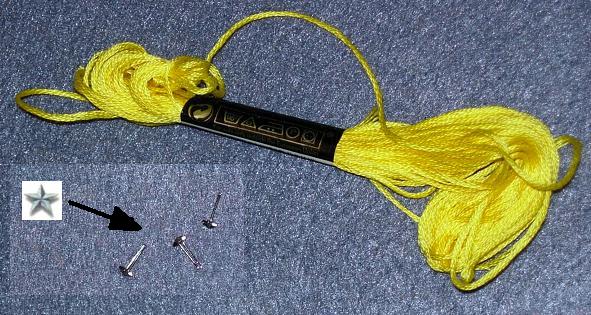
Some more materials I used for these projects.  This is embroidery thread.  It comes in many colors, shades and even in metallic thread.  Very cheap and easy to find one roll with go a long, long way.  The stars are military ribbon devices.  These little metal stars come in three colors, silver, bronze and gold.  The Italians used a lot of stars on their uniforms and these fit perfectly.  The going price for these is $.75 cents a piece.

Click on picture for larger image

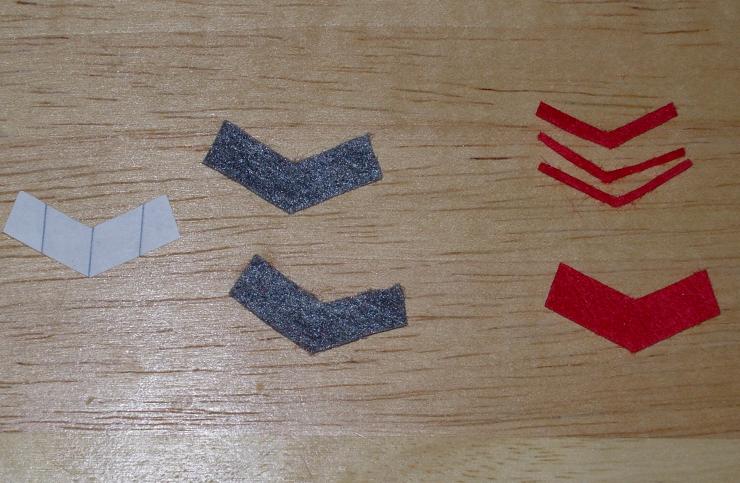
First I cut a pattern out of paper to get the right look and angles.  This can be surprisingly difficult but making mistakes with paper is much more painless than using up prepared materials.  Next I cut out the base material and chevrons.  I used the hemostats to handle the tiny pieces and glue them together with the fabric glue.

Click on picture for larger image

Examples of finished patches and insignia
 
This is the patch I made in the tutorial on the left.  Also notice motorcycle policeman the collar insignia.  I carved this out of styrene, painted it with acrylic gold paint and outlined details with black paint.

Click on picture for larger image

Notice the collar tab on this Bersaglieri soldier.  A felt background with a metal star mounted on it.  I used one of the Ribbon Devices for this star.

Click on picture for larger image

An Artillery 2nd Lt.  I made his shoulder boards from cloth wrapped on cardboard.  Yellow embroidery thread is used for the outline of the boards an the detail of the insignia was copied, reduced and hand painted.  His collar patch is felt with a Ribbon Device star and the yellow thread is also the embroidery thread but is much thinner because I used one strand of it after unravelling a short piece of it.

Click on picture for larger image

Another picture of my Military Policeman showing the helmet eagle I carved out of a piece of styrene.  Like his collar insignia I painted this with gold acrylic paint and highlighted details with black paint.  These pieces could have been much more detailed and precise if they had been sculpted, but to date, I have no sculpting skills to do this so I did what I could with what I had.

Click on picture for larger image

This last photo is a pre/early war rank patch that was slipped on over the sleeve rather than sewn on.  The single star in the center denotes two years service and was cut out of felt as this part was not done with metal on the originals.

Click on picture for larger image