|
All Pictures below are thumbnails, click on them to see larger images
T-34/76 Model 1941
As built by Factory #183
The one thing I noticed right away was that not all T-34/76 tanks
were built the same. As a matter of fact, even the same model (year) were not built the same. It depended on which factory
in which it was built.
From the pictures I could find and my own observations I settled on Model 1941 as built in Factory
#183.
I started off by replacing the wheels. The one piece wheels as came with the tank would not permit using a track with
the guide teeth centered on the inside of the track. I decided to make my own wheels using Bondo fiberglass resin. I made
a master mold then pour 20 wheels. After finishing them off, I mounted a spacer between two of them to give the guide teeth
a place to pass thru. I also made some wheels to replace the front and rear drive and idler wheels. I used an old rubber track
I had laying around. Even though it’s not accurate, I think it looks good on the tank.
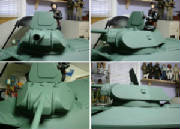
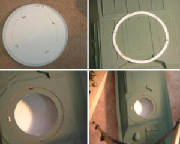
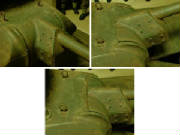
Next came modifications to the turret. I started by cutting out the hatch and making a new one that would hinge. I also cut
the turret ring away from the hull and mounted it to the bottom of the turret. Next I used a plastic ball-bearing turntable
in between the turret and hull so the turret would traverse easily. I added lift eyebolts and side extensions to the turret
to look like a picture I found. The biggest improvement was making the gun mantlet a separate piece so the gun would elevate.
I used a piece of pvc pipe and cut and modified it until I got the look I wanted, then I placed a piece of pvc pipe inside
the turret and bolted the mantlet to it so give it movement.
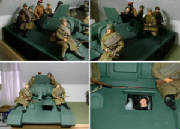
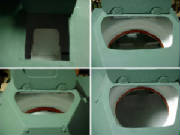
I then added tow pad eyes, exhaust pipe extensions, a "DT" LMG, cutout and replaced the driver’s hatch, and installed
seats in the front hull and turret for the 4-man crew. Next was to cut out and hinge around the engine deck. Last thing was
to make the tool box and mount that to the right side of the tank, then paint.
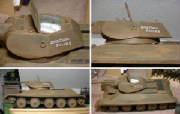
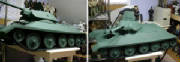
I tried to copy the paint scheme from an article I saw in AFV Modeler Magazine Issue 8, even though it was from Factory
STZ instead of #183. I painted the interior white. On the outside, I initially had a quart of paint (European Dark green)
mixed to match what I read was an exact match to the Russian green paint used on tanks. The result was a green that was too
green, not enough brown in it to match what I thought it should look like. I decided to give it a splash of oxide red, which
I rubbed off as I put it on. I then followed this up with a splash of oxide burnt umber and rubbed/wiped off as well. This
gave the appearance of a dirty, brownish/red surface. I finished up with a wash of Floquil Dirt applied the same way to give
the appearance of having been thru a muddy, dirty environment then dried on afterward. I believe I captured the feel of a
tank having been thru a recent muddy battlefield terrain.
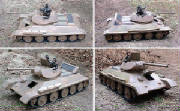
Here's some pictures I snapped this morning before it starts snowing (it's awful cold here). The site I got the slogan
from says it means "For Mother Russia".
|


