|
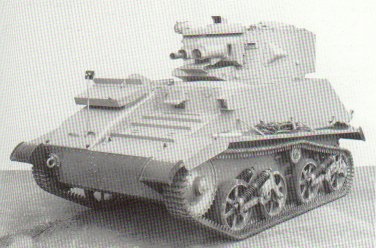
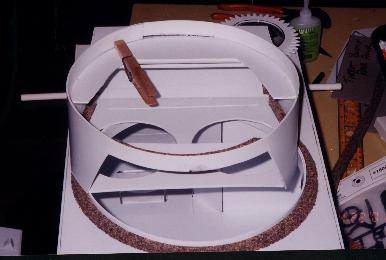
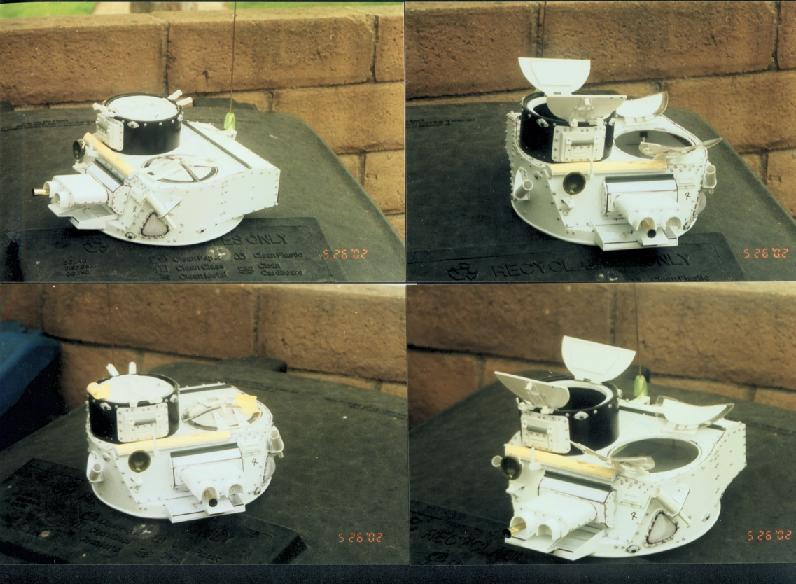
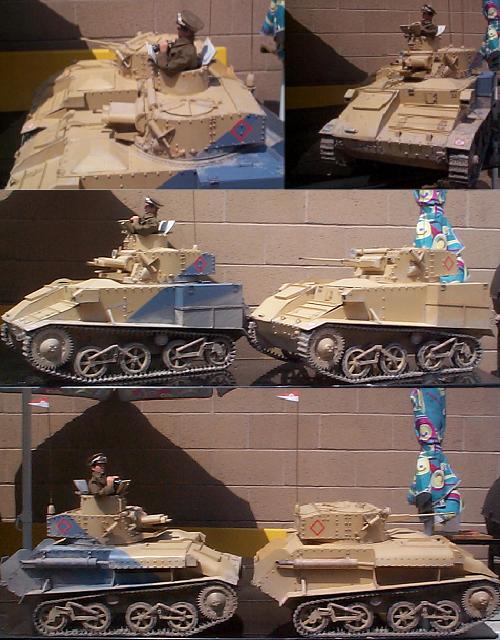
Pic 1 shows the first tank hull with the driver in it. I plan on this being the version used at Tobruk hence the hat, but
there will be no room for the hat in the finished model. Drivers space was very cramped and a special cut out with cover was
installed for more headroom in the real 1/1 version.
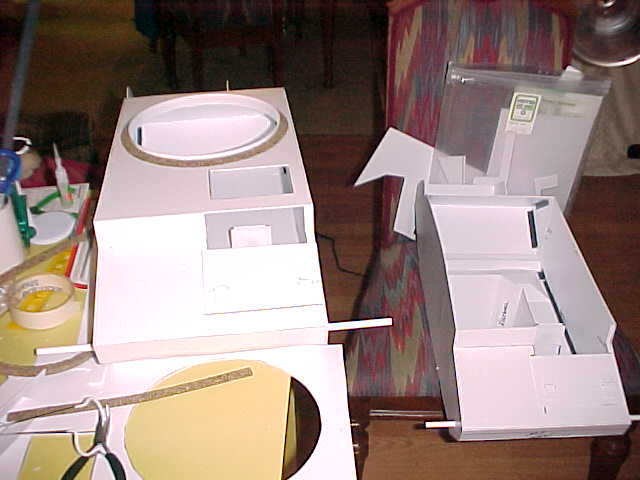
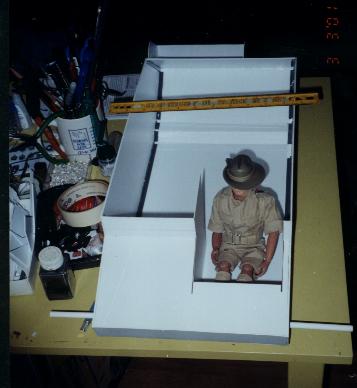
Pic 2 shows both tanks under construction. I have finished with the interior in the one on the table, added the deck and finished
the turret ring. Unfortunately the drivers hatch is giving me some problems at this point so I had to remove it and completely
redesign the entire upper hatch.
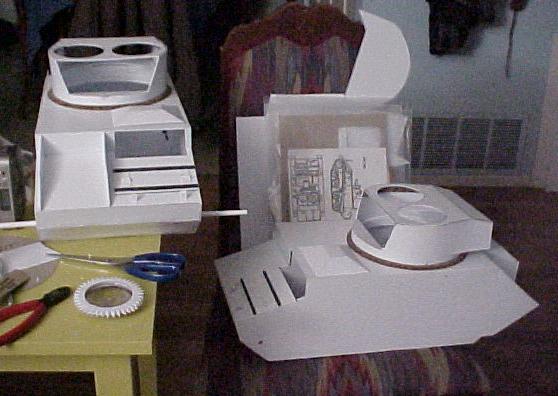
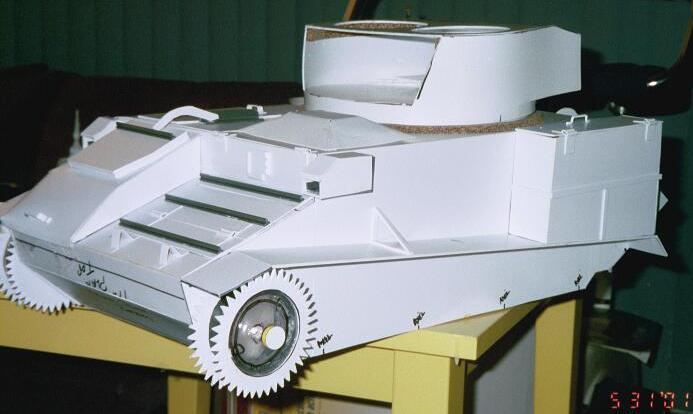
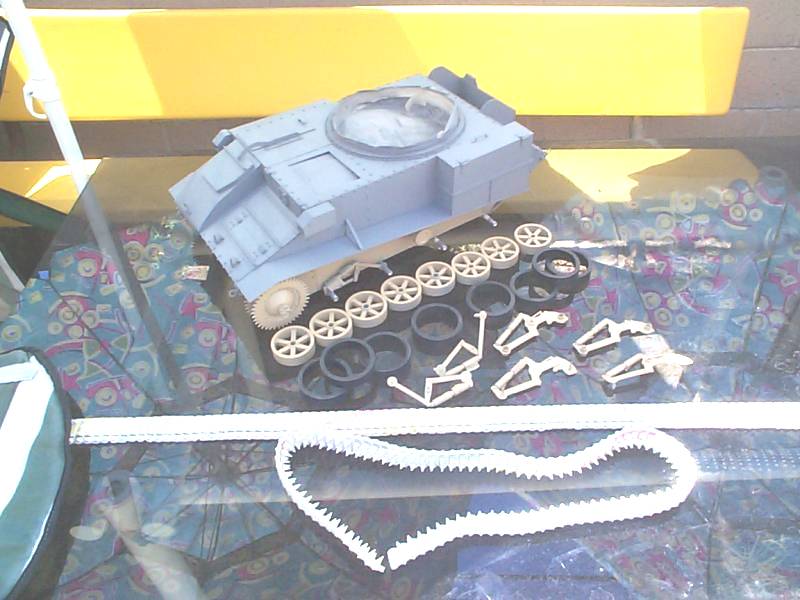
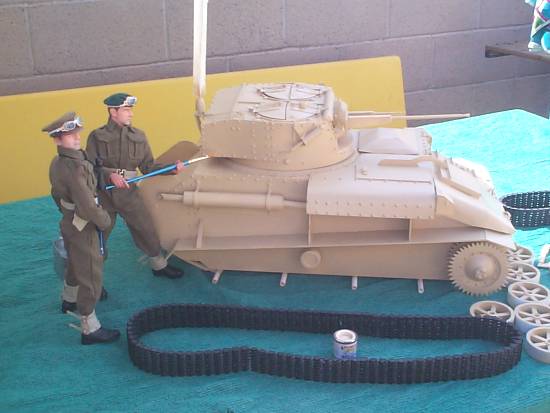
Pic 3 both turrets are partially done at this point. Work has begun on the road wheels. I had to scrap the original idea for
the road wheels. Work has also begun on the engine compartment cover on the front of the tanks.
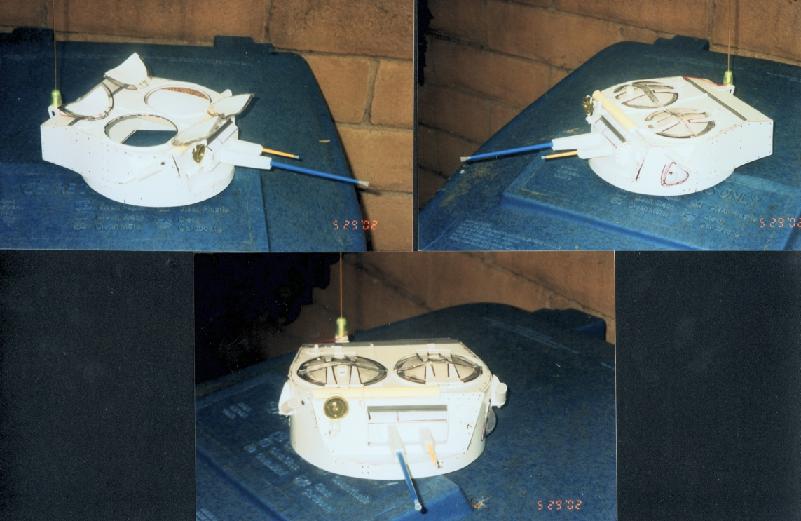
As work progresses, I had to add bracing to the inside of the turrets (pic 4). Because of the shape of the turret the sides
would pinch in so the turret would not fit on the turret ring without a fight. Here the bracing is clearly visible and is
only half done. Still the turrets don't quite fit right on the turret rings. My current plan is to cut down the turret rings
and rebuild them in a smaller diameter. This should correct the problem.
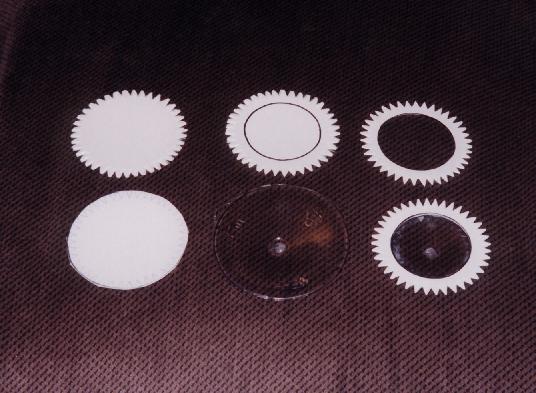
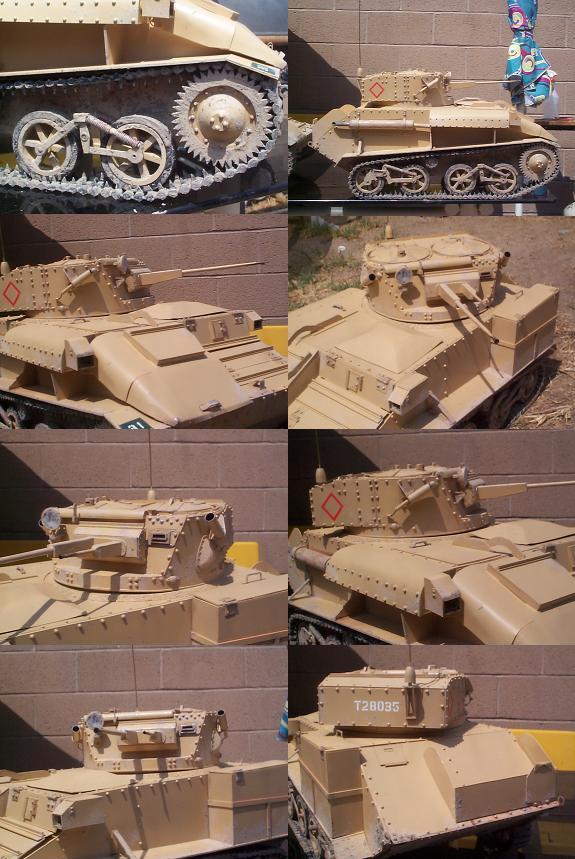
The biggest question for modeler's building a 1/6 scale armored vehicle is what did you use for tracks and wheels? I made
my own wheels (pic 5). The original plan to cast a sculpt of the road wheels failed. Plan 2 involved me scratch building them
and here you see the front geared sprocket wheels in various stages of completion. I used thinner Styrene material that was
flexible and was fairly easy to cut with a pair of shears. I originally used a pair of wire snips to cut out the teeth, but
found later it was by far easier and cleaner to cut them out with shears. The rubber tired road wheels have been cut out of
a piece of ABS irrigation pipe. I scratchbuilt the spokes and found some rubber sleeves that fit over the pipe. I will be
cutting sections from the sleeves to fit on the road wheels as tread. However, that will not be permanent until after the
paint job.
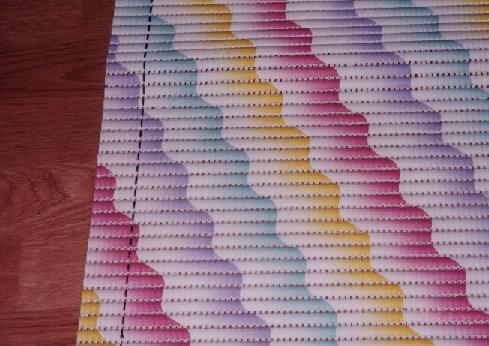
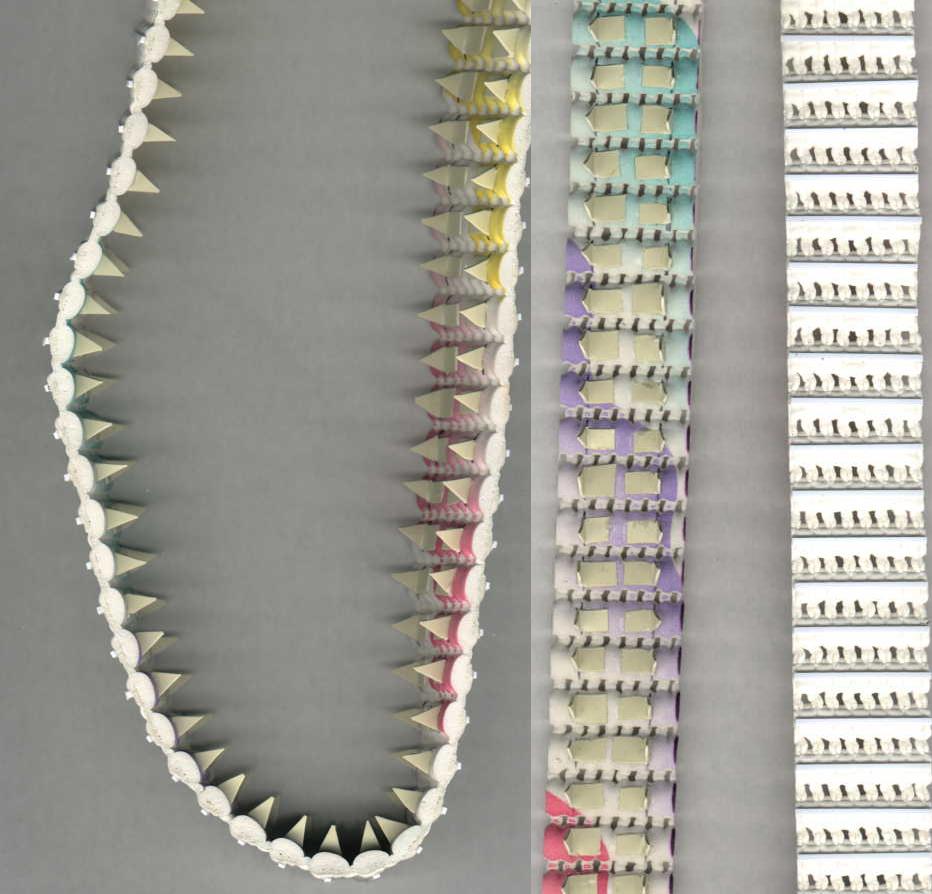
Tracks were harder to do until I found this material (pic 6). I had planned on trying some difficult process to make each
link, but that would have stretched this project over a year or more at this rate. I found this foam material at HomeBase
which is now defunct in my area unfortunately. This was made in Germany and yes I kept the label. The reverse side of the
mat is a really nice looking tread pattern. This material is strong, flexible and easy to cut with a pair of scissors. Here
I marked off the size of the track in preparation to cutting. *UPDATE* I have found another supply of the same material at
Walmart. As floor mats cut in the shape of a huge foot or a fish. Same material but with about 2-3 different molded variations.
I did find the same mold pattern as I am now using but does not seem quite as crisp of a mold to me. Perhaps that is just
my imagination. Should I find this material anyplace else I will keep you all posted.
Pic 7 shows the almost completed hull details. The one detail I am saving for last is the hull rivets. Vickers tanks had LOTS
of rivets and I will be using my favorite trick for these, miniture doll eyes. I can't recall offhand what size (I think 3mm)
I used, but they are the smallest I can find and come in a gross lot of 144 for roughly about $1.00 a bag. I usually find
them at my local craft supply store (Tall Mouse).
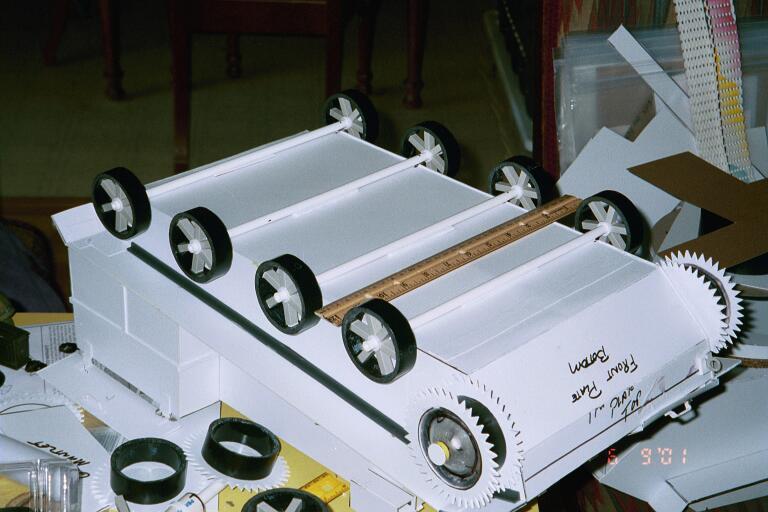
In Pic 8 I have attached the axels and slipped on the road wheels (still lacking rubber tread at this point).
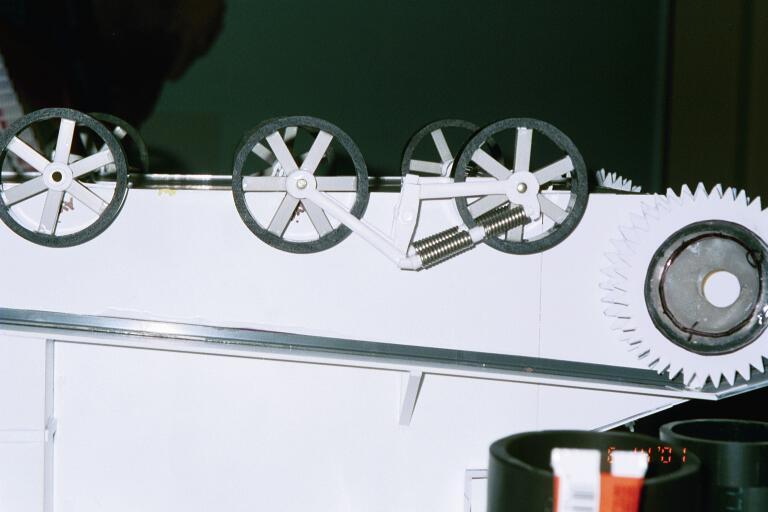
In Pic 9 I am currently working on the suspension details. This is taking far longer than I anticipated as I have to carve
each piece from stock styrene. For the springs, I used Solder wire and wrapped it around styrene tubing.
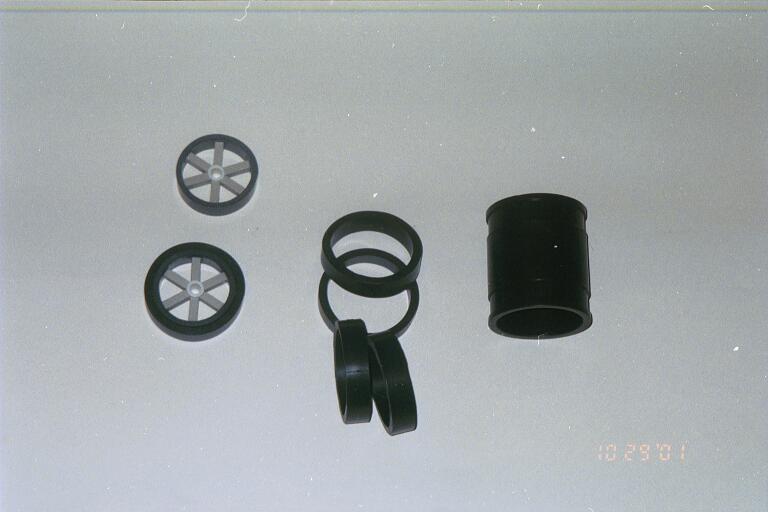
Pic 10 shows the parts of the road wheels. Jeff Finney cut a 2" PVC pipe for the wheels and I added spokes
and the hub. This was really easy material to work with. Then I bought the rubber gasket sleeve (an exterior 2" sleeve gasket)
and was able to cut two wheel treads from each one. You can see the completed wheel at the bottom left. The rubber tread will
not be added until after painting.

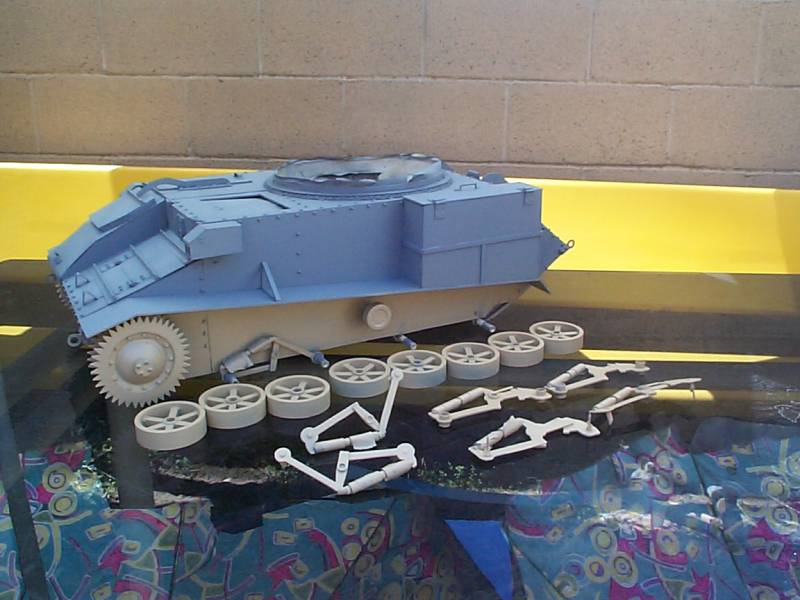
Pic 11. The completed suspension and road wheels. I have already completed the tracks as well and they have come out much
better than I had anticipated. Again, those will not be installed until after painting. Pics of the tracks will follow. The
pink supension wheel at the top came from a Real Friend airplane. At this point the hull for tank #1 is completed and I am
presently bringing hull #2 up to date before I continue on to the turrets. Once those are finished, the tanks will be ready
for painting and be delivered to Jeff Finney for his final approval.
Pic 12. A close up of the completed tank tracks. At this point, both tank hulls are completed and I only
need to finish the turrets. Jeff Finney has started work on painting the first tank hull and after I get the turrets
done, I will be sending him the remaining parts. The tracks are suppose to be attached after cutting to fit and painting.
Pics 13 & 14. Done and ready to be sent off for painting. The turret above is for the Mark 6b and the
one below is the Mark 6c.
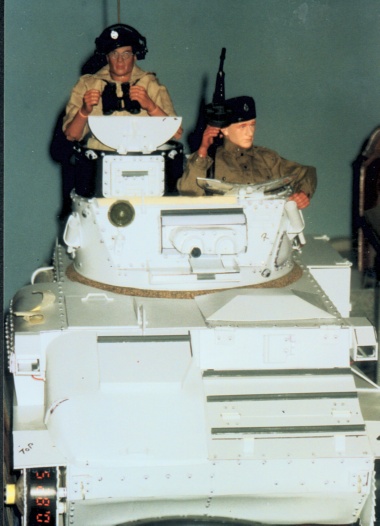
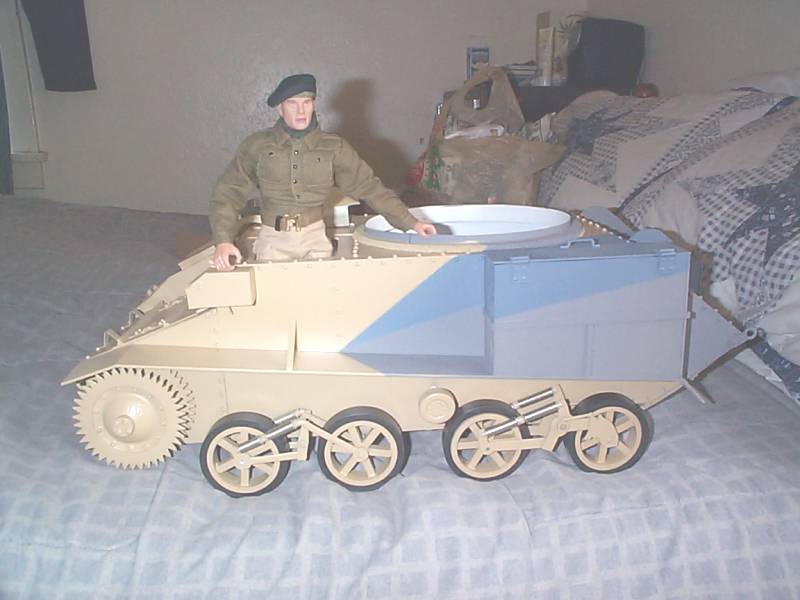
Pic 15. The completed Mark 6b with my tank commander and gunner. All that's left to do now is the painting.
For this I am shipping both tanks up to JD Finney's house.
Painting of the first hull. JD Finney is doing this one in desert
camo. The second one should be in desert yellow.
May 28th, 2002. I have finished the first turret! This is the Mark VIb version with a .50 caliber and .303
caliber Vickers MG's. The turret was a pretty intense project, it took over 250 rivets alone. My next turret I
have decided to change from the Mark VIb version to the Mark VIc version with a 15mm BESA cannon and coaxial machine gun.
For now the first turret is finished and now waiting to go to Jeff Finney for painting and final work. I hope to
get a picture of the turret and the finished tank soon.
Jeff has started adding markings on the Mark VI tanks using a combination of decals and paper printed markings.
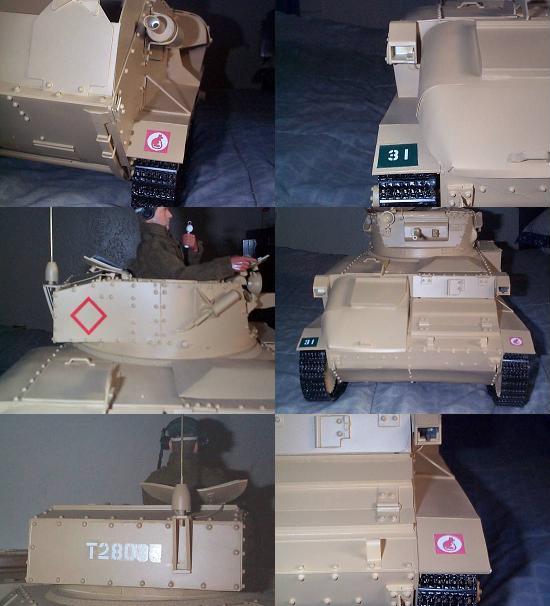
Here are the tanks after getting 'weathered' by JD Finney. They are pretty much finished now and just awaiting
the usually bric-a-brac customizing with the daily personal belongings and equipment a crew would need to operate during a
war.
|