|
All pictures below are thumbnails, click on them to see larger images
I started this project with the DML Dragon Pith Helmet that came in the carded German Luftwaffe and DAK soldier
uniform sets. I spent a long time researching to get the correct insignia and look of the Italian Bersaglieri helmet.
My first order of business was to find the right material to make the cloth Roundel with the Italian tricolors.
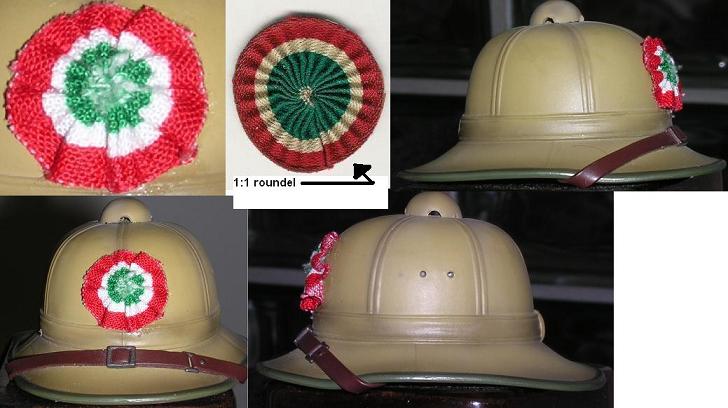
For the Roundel, I first spent time considering the materials I had available to me. I considered paper and I still
think that would work well, but ideally I wanted to do this out of cloth like the real thing. So a trip to Tall Mouse
Craft store and their fabric department and an hour later I had found a cloth that had the correct red, white and green stripes
in the proper size. This I took home and carefully cut long strips to make the roundel from. Next I took some
green thread and ran that thru the bottom (the green stripe) of the cloth bunching it every so often (this is called pleating).
When I got to an appropriate length I tightened the thread and the entire thing just curled up into a ball. I tied it
off, flattened it out and then glued that to the front of the helmet.
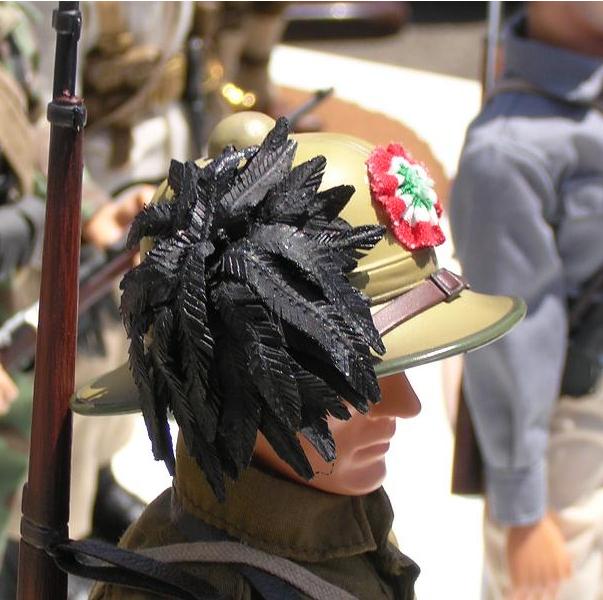
Next came the feather cockade. I spent a great deal of time considering materials for this and again I first wanted
to try actual feathers to mimic the real thing. Two days and two tries later the best I could do was the appearance
of an exploded pillow. It wasn't pretty.
I immediately put out a cry for help on the internet chat groups and my friends came thru for me with tons of suggestions.
Many very good ones. A few urged me not to give up on feathers. (By the way, ceiling fans are evil when you work
with loose feathers!) One person, who we call Special K (who is an impressive customizer in her own right)
gave me the tip that ended up being money in the bank. Use paper twist ties. The clarity of this answer rather
bowled me over! That night was an explosion of twist ties, trimming and cutting. I would cut a twist tie with
a taper at one end, then using surgical scissors made the feather cuts on each side. Reaching the appropriate lenght
I would then cut the feather about 2/8th of an inch below my final slant cuts and then trim the sides to make a quill.
To fasten this to the helmet and create the cockade effect, I resorted back to my father's family business. Florist.
I used green Florist Clay I bought from Stats, a Floral Supply and Craft store. This stuff is pretty hard at first but
quickly gets soft when you knead it between your fingers. When it sits for a lenght of time it gets hard again, although
hot weather will soften it. Unlike children's play clay, Floral clay is very sticky also. I took a small clump
of this and shaped it on the side of the helmet. Then I took each feather I cut out and shaped it, dipped the quill
in white household glue and stuck that into the clay. The glue will hold the feathers in place and give some added rigidity
to the clay. From there it was much like making a flower arrangement with feathers.
After I completed the feather arranging, I sprayed the entire thing from all angles with flat black spray paint and let
it dry overnight. Then I glued this onto the side of the helmet with Super Glue. I was rather impressed with the
results!
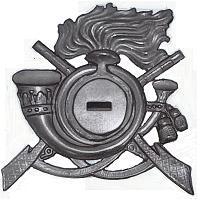
Making the Bersaglieri helmet badge was harder. I took the picture below with the red background and printed that
on a B&W laser printer the full size of the paper. This I took and carefully outlined the badge lines with a black
Sharpie felt pen. Then I used White Out and White Correction Tape to eliminate the background (see pic above).
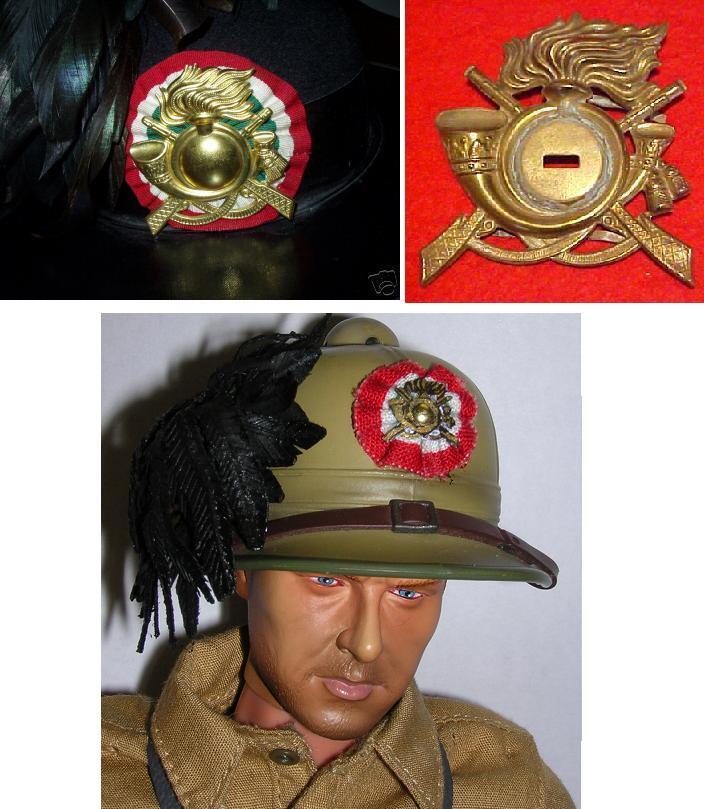
This I scanned back into the computer and then I resized it down to 1/6 scale. I copy/pasted about a dozen of these
and printed out a sheet.
Using a very small brush I used Acrylic gold paint to paint in the metal parts, then I outlined it as best I could with
Acrylic black paint. Note in the picture below are two of the same badge. The one with the red background has
the center ball removed. This was to enable the wearer to replace it with one that had the unit number impressed on
it. To replicate this metal ball I ran a small metal brad thru the badge and cut the head off. Then I Super Glued
the entire thing onto the helmet roundel.
I should mention that white glues don't hold very well to the material the helmet is made of. The Super type glue
I used worked very well for this.
|


