|
I got mine today, and as I requested, nothing was cut-out or assembled. So, for anyone wondering about the first
step, it took me about 20 to 30 minutes to cut out all the major pieces and hatch openings. I used a jigsaw with a woodcutting
blade. Next, I'll clean up the edges on the grinder. I didn't cut the small pieces out, or the tools, etc., until I
will need them....keeps them from getting lost that way. Looking at the blocky things, I assume these are the four brackets
to mount the barrel lock and the two tow hook brackets(?).
This stuff cuts like a dream.
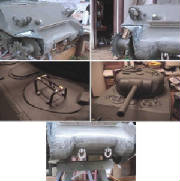
I first used an angle grinder (this one I bought a few years ago at Harbor Freight Tools, and it has outlasted and outworked
brand-name tools. Cost; 20 bucks USD.) to hog-out the inside hull hinge mount. This provided a smooth path for the also-rounded
hatch-hinge mount to travel through.
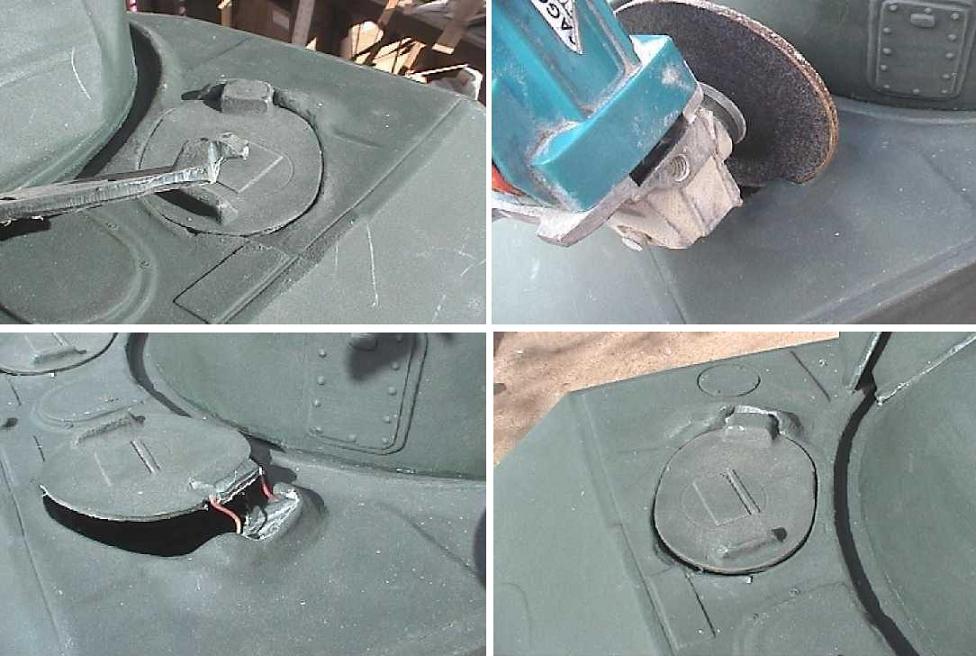
Then, I drilled out the inside of the hull mounts, and the hatch mounts, and ran a length of plastic coated telephone
wire through and into the hull itself. A simple pull from inside with pliers snugged everything up real nice and tight.
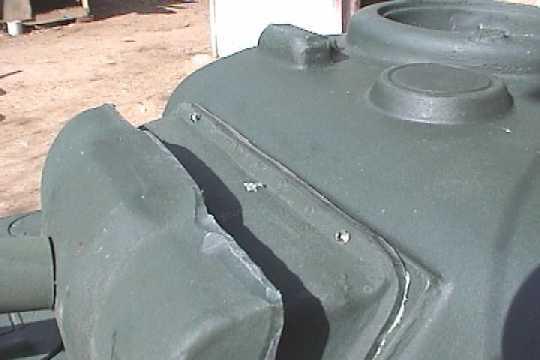
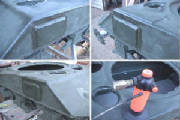
And here's how I attached the mantlet housing. I drilled through the existing bolt-head pattern molded into the piece.
Then I screwed from the inside. The protruding ends will be ground
off and should appear like bolts heads when weathered.....hopefully. Sure they will, really.
There are four screws total. One at each corner.
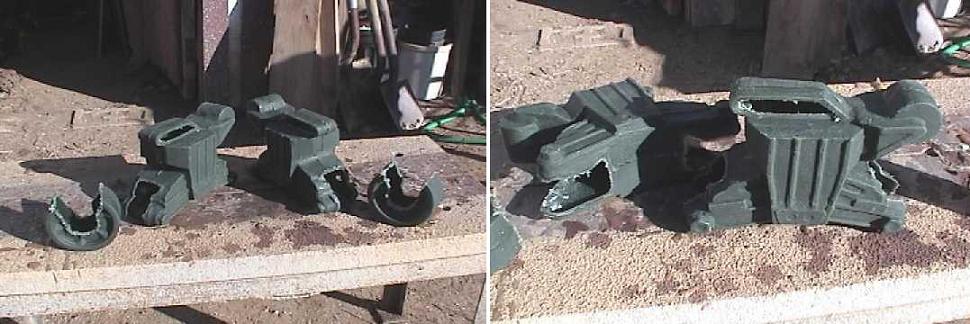
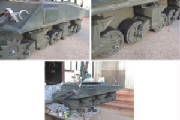
Welp, as some here have seen, I like to play with my toys. That includes pushing them around the yard. With that said,
I figured that the running gear and tracks were going to be the project for me. Knowing full well that I could never
improve on the existing suspension, I really like the look of it in its "issued" state, I elected to change out the bogies
so they could roll. Here's what I have so far. I used the jigsaw and angle grinder, and simply cut the molded-in bogie
out. I also hollowed out the inside of the return leaf. These two pieces took about 15 minutes to get where you see them.
The plastic is good and thick and stout. It should be enough to mount a replacement wheel into. I will backfill, however,
with either bondo or possibly JB Weld. Just to stabilize the axle/pin.
There's a good chance I'll do the return roller
the same way.
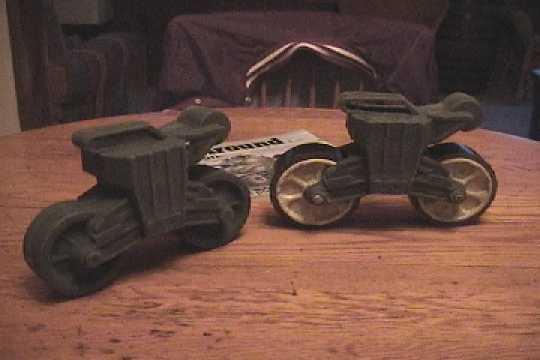
Ok. As I previously posted, I had cut out all the one-piece molded bogies. Now, I needed to replace them with scratchbuilt
whole ones.
I started with a section of 3 inch ABS pipe for the tire, and sculpted a (fairly pathetic, but I am admittedly
not a sculptor) new bogie. This I used as the "plug", or master, from which I created a mold to cast up as many as I would
need. I incorporated the grease fitting depressions as seen on actual designs. Here are the first two cast bogies mounted
in the suspension. The actual color is more of a puke-green than the pictured yellowish. I still have to arrive at the proper
combination that will give me the shade I want. This, in case they get scratched up after painting, they won't be a distracting
color underneath.
I also spent today cutting teeth for the tracks, which I have already trimmed the flash from between the connectors on.
I will experiment with adhesives this week. FYI, The drive sprocket, which I have cut-free and exposed the teeth on, fits
the tracks perfectly. Pics to come when I get a section of track to show with it.
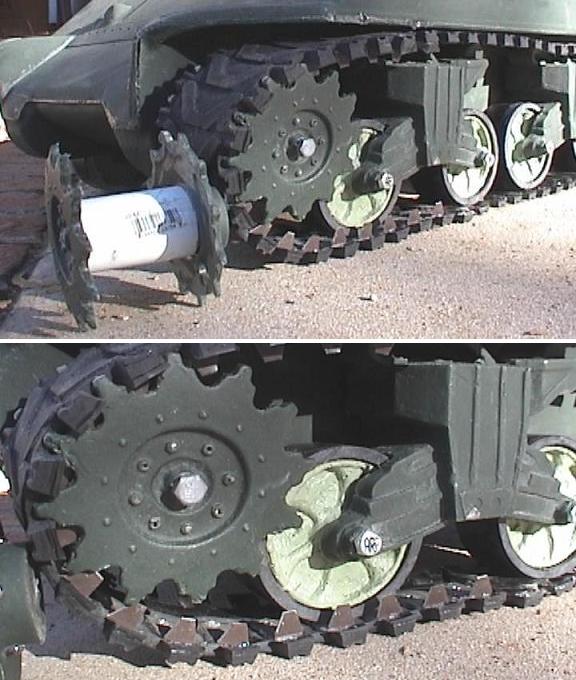
I cut the sprocket out of it's "drum" state. The width of the track teeth is identical to the width the sprocket
halves need to be if a PVC pipe coupling is used as a spacer between the two halves(thanks, Mein Kreig/Fred). Perfect.
And the space between the track links fits perfectly on a 3/8 inch wide bench-grinder wheel if you want to remove the "flash".
The "teeth" are aluminum and will eventually go all the way around. They're glued in with GOOP, which I have found to
be very effective on this track material. The bogies are still unfinished, and will sit out more when done.
A
word of caution on the track. KanoWarrior has already mentioned that some pieces may suffer from a glitch in the curing
process of the vinyl, resulting in a brittleness. Well, one of these said pieces just broke in several places from the
cold here. And I'm talking Southern California cold. Cold place inhabitants beware. Anyway, that's why the
track looks loose in the pics. It wasn't like that before. I am sure that a piece of fabric or innertube glued to the
inside will cure any such future problems. I'd like to get a couplethree extra sections from James, anyway.
------------------------------------------------------------------------------------------------------
Ok. As many of you may know, I got nailed by the flu bug, which put the kibosh on the Sherman work for a while. Slowly,
I've been working on it the past three days. All the bogies are now cast, and await priming and painting before being
set into the "tires". I also got around to starting some of the detail work. Here's what I did today;
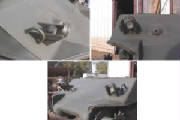
As you can probably see, I ran a "weld" along the seams where these would have been visible, and installed some applique
armor pieces to the hull sides. I've seen numerous pictures of even this model having the plates attached as a precaution
for the crew, even after wet-stowage was introduced.
The last pic shows what I use for the effect. First, I GOOP the
pieces on, then, I just heat/melt with the microtorch and spread with the flattened and partly "spooned" piece of fence wire
to give the "bead" effect. Same along the corners of the hull.
I also installed an aluminum plate to enclose the bottom
of the hull.
The new bogies are cast, painted, and mounted. I painted the lower hull as well, and am happy enough with the color.
I want to re-position the suspensions, as I am not happy with their placement. Easy enough, and a minor job for later.
I also painted the inside of the turret with the new "Fusion" paint for plastics (white) and will report on the results when
fully cured.
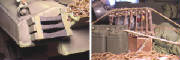
And this, gentlemen, is why they're called "lifting rings". I've been adding scratchbuilt rings and headlight
guards made of aluminum the last couple of days. I have to scratchbuild some lights yet. It may all be a bit off size, but
I am past worrying about it now.
Here are the completed headlight assemblies and guards. The lights are wooden spheres from the craft section at WalMart
(1 inch). I cut a fourth or so off, then hollowed it out and painted the iside a dirty white. I then filled it with hot glue
until a miniscus formed (a surface tension bubble). It looks like a lens to me.
I also re-sculpted the hull mg sponson/mount.
I ground the face of the old one perpendicular to horizontal, then epoxied a third of another wooden ball to the front. I
then built-up with Bondo. The remaining two-thirds of the ball I hollowed out and that will be the mg mantlet. The entire
assembly looks pretty ok.
You can also see the color I am re-painting it. I really like the shade.
Lots of progress lately. This thing is like a drug. The more I do, the more I see things that I need to do over that.
I don't know where to stop Anyway, here is a taste of some little extra details I'm doing. I want to stress/repeat that
I am trying to use as much of the stock JD stuff as possible. This is kind of an experiment to see how these can look using
most of the supplied parts. I admit that I have built alot of extra details, but have also left much "as is" or simply "cut
away" plastic. I probably haven't spent more than twenty dollars US, aside from the initial cost of the tank. These really
do have alot of potential if enough tlc is applied.
All the extras are made from either aluminum, or wire and brazing rod (in the case of the periscope guards.)
I haven't run into any problems with "thinness", yet. There are varying degrees of thickness, but not appreciably noticeable
or problematic. As far as the front flange, or any of the several flange/overhangs on the piece, I just kept telling myself
that "If it's hanging over and not making contact with anything, then regardless of the finished thickness at the hull, it
can be removed." I used an angle grinder to knock it all down, and a farrier's rasp to true/smooth it up.
When using
auto-filler ( I use Bondo), I have gone a bit farther than just "keying" the area (roughing up with sandpaper to give a "bite"
to the stuff). I actually drill tiny holes at intervals under where I will be applying it, and push the filler into them,
then build up.
The chicken is a Sculpey one I built just for this. The cage is made from sticks and string. Pre-cut all sticks
to the desired length, lash them together with any type of string, then dab a bit of glue onto the contact joints to "tighten
it up" a bit. I don't know of any (since I never looked) sites that explain lashing, but I have been doing this for years
in 1:1 for buildings, cages, furniture, etc. The process is fairly simple when you know the basics (and basic they are). It's
all the same in 1:6, just smaller.
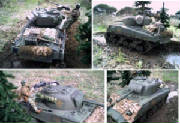
Among the numerous upgrades, I completely re-did the shell ejection port (squared it and the hatch up), installed teeth
on the tracks, and that's also a rotating commander's hatch, too. Keeping to my intended goal of using as much of the "issued
with the toy" gear as possible, I am fairly satisfied with the results.
The color I used was several overlapping coats of Krylon rattlecan camouflage OD over some cheapo generic WallyWorld
grey primer. I then over misted with a mixture (more like a concoction) of various colors of WallyWorld acrylics in a lighter
shade with the airbrush. This was the same stuff that I did all the corners with to simulate wear, only I applied it heavier
along those points. Finally, a wash of black and dark brownish in seam lines, weld seams, inside corners, around raised areas,
and especially around the fuel caps to simulate spilled fuel and oil etc.
|


