|
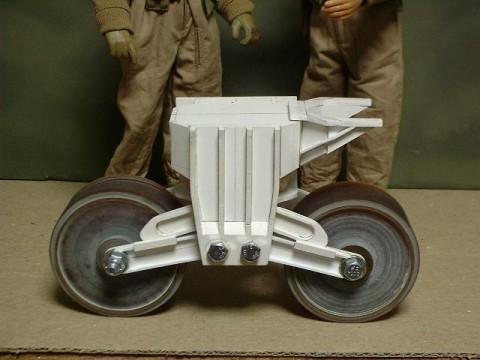
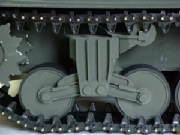
I've got all 6 bogies made. The backside of the bogie assembly was made just like the prototype and hopefully I can mount
it to the hull in a prototypical fashion. I need to make 6 more road wheels and 4 more return rollers. I made them by
pouring resin inside a piece of pvc pipe then turning/finishing them in my lathe. I made the wheels with the dished center,
but I really like the webbed wheels better as those were more commonly seen. I may take one of the dished wheels and play
around with it to convert it to the webbed type.
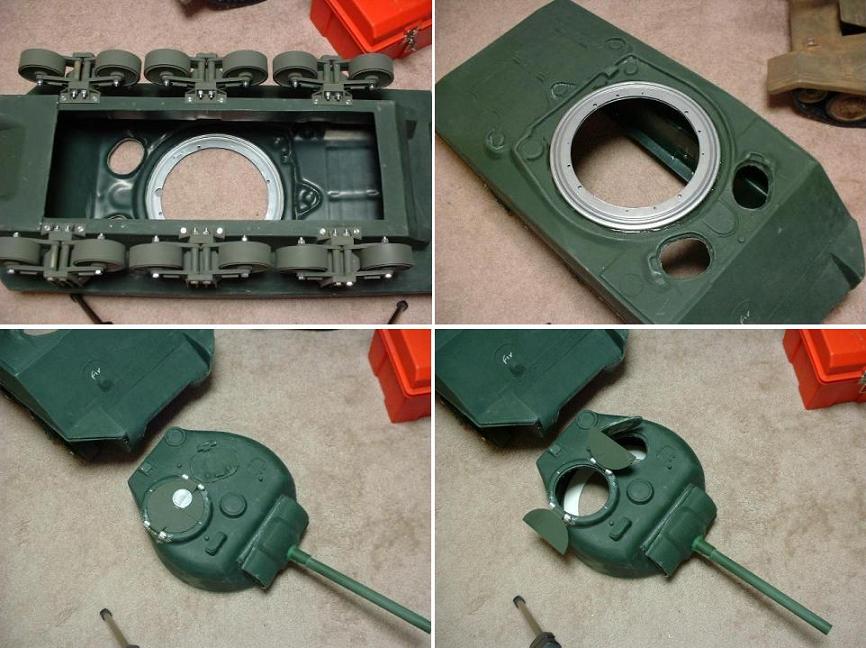
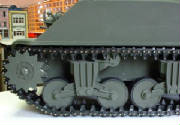
So far I've been working on my bogies and turret. I still have to make the return roller mount, the drive sprocket, and
idler sprockets. I want to make the drive sprockets out of aluminum if I can find some 1/8" or 1/4" thick stuff. The idlers
will be made from 3" pvc pipe. I'm going to try making them with the stamped inner hub look to them and if that comes out
ok I'll probably modify my wheels to match the stamped part. I put a 12" ballbearing turntable on for the turret and made
a new commander's hatch and hinges.
Here's a couple of pix of my progress fo far:
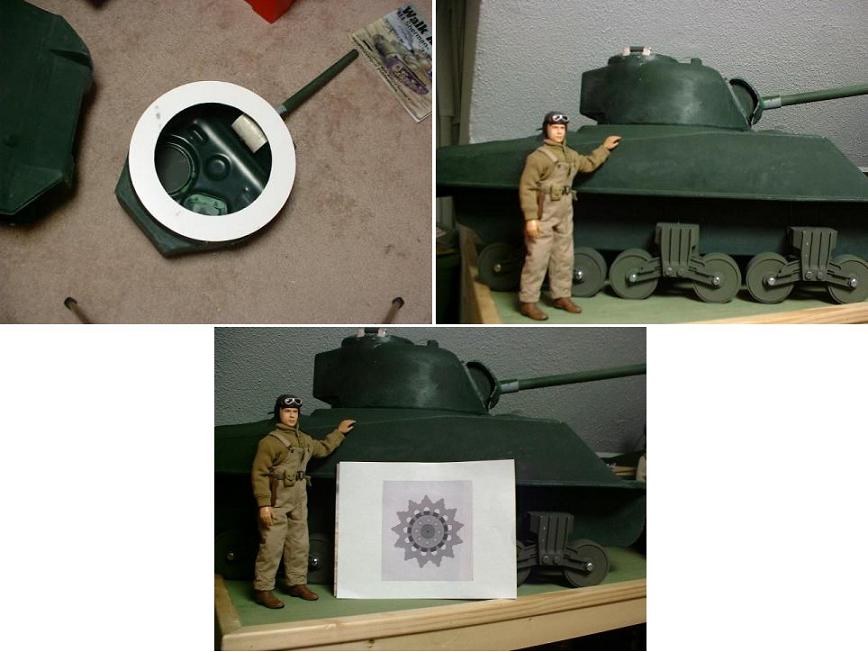
That's a 9" opening in the bottom of the turret! I scanned the sprocket out of a book I have. I had a pack
of Invent It! Window Decal Sheets lying around and decided to see if I could put 2 copies of the sprocket on 1 sheet.
This is the same stuff you'd make a decal on and stick inside your car window. I plan on sticking it on a piece
of aluminum and then cut them out.

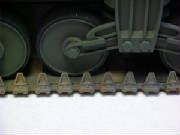
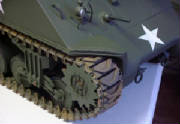
Lowe's carries a 1/8" x 36" steel rod in the section that has steel and aluminum shapes. I used 78 tracks per side so
I got enough to do 80 plus links. I cut them 2-3/4" long (I didn't use the duckbill extensions) and got 13 out of each piece.
That means you'd have to buy approx 25 pieces of the 36" long rod. At $2 apiece that's $50!!! I'm sure there's a cheaper way,
but I already had a bunch of 1/8" rod from my own attempt at making tracks, so i stayed with that. Kilroy6 suggested using
nails. If there are nails that are 1/8" diameter they should work fine, but I'd cut the head and point off as the points are
normally spread out due to how they cut them.


Steve (aka panzerwerks) offers the headlights and soon the track links as well as some other parts for the Sherman I
believe. www.panzerwerk.com/The bogeys that come with the JD Sherman are fine for a static model. The tracks that came with
mine must have been off the first pull as they seemed too soft and almost fell apart in my hands. When Steve said he was going
to make these injection molded ones I went ahead and made my own bogies and roadwheels. Other folks have had no problems with
their JD tracks.

I used brass rod which I bent and soldered for the cages around the periscopes on the hatches. I then drilled holes in
to sit them in and super-glued them in place. For the cages around the lights I used thin flat brass strips bent and soldered.
I heated an end of a piece of flat brass and stuck it into the hull to make the hole then super-slued them in place. The material
the hull is made of is easy to make a hole in.
I made new hatches and hinges then used my Dremel to cut out and finish
the hatch openings. To drill the holes for the pivot pins I used a piece of clothes hanger wire in my Dremel, then used a
piece to form the hinge. I think some folks have replaced the entire hinge area. I made my hinges out of a 1/2" thick piece
of plastic I had and shaped to make it look like the originals.
I just put the last of the 78 links/side on. It took longer to cut the pins than it did to put together the links.
I
still have a lot to do like weathering the track,touching up the paint, and adding some tools, but hopefully you can see Steve's
handi-work.
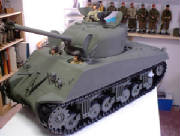
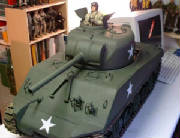
I managed to weather the tracks this week and get some decals on the hull. It's about 90% complete. I need to get some tools
and make the tool holders and put all the other gear I have onboard (spare track links, wire rope, gas cans, personal equipment,
etc). I have a basic interior, but managed to make the seats for the crew more or less operate like the real ones in the drivers
compartment and turret basket. I have a 12" lazy susan ballbearing turntable underneath the turret and made the gun barrel
to go up and down (I have a piece of pvc pipe, sandwiched behind the mantlet, screwed into a plug in back of the barrel).
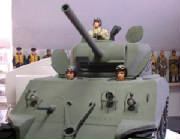
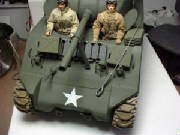
I also have the full 5-man crew decked out in Macs tanker gear. This thing rolls fine on carpet, concrete, and ground. It
even makes the squeaky tank noises (could be my homemade bogies starting to give way!!!). I also need to give it a couple
of shots from my spraygun to put a little dust on the hull. I bought an el-cheapo spraygun at Big Lots for less than $10 and
used it on the tracks. A little light spraying should do the trick.
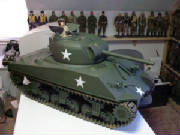
This is the Desimone Sherman with Panzerwerks tracks
(78 links per side), drive sprocket, and headlights/siren, and homemade roadwheels and bogies. I cannot thank Steve H and
James D (and Tim "plasticpanzers" Loeb and Tim "kanowarrior" Kano) enough for making this happen.

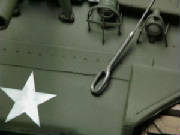
I stopped by Lowes the other day and bought 1 foot of galvanized chain (the saleman kidded me about
only wanting 1 foot!).
I cut every other link off so I had a hand full of separate links. The link is 3/16 thick (diameter)
and 1-1/4" long. I drilled a hole in the end of it, super-glued a 36" length of 1/8" wire rope in the hole, and slid some
telescoping brass tubing onto the wire and glued it in place. I then puttied up the ends to make a smooth transition from
the rope and link to the tubing. This was about the cheapest way i could think of to make my wire rope for the Sherman
|


