|
I'm trying to keep it below $200 by using mostly items I can find at the local Home Depot to fix it up. I did give in
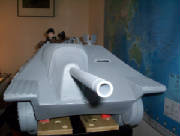
and buy an MG 34 mount from Armorpax and a Notek light (not yet mounted) from Panzerwerks. The gunner's periscope is a flashlight
from a 21C figure.
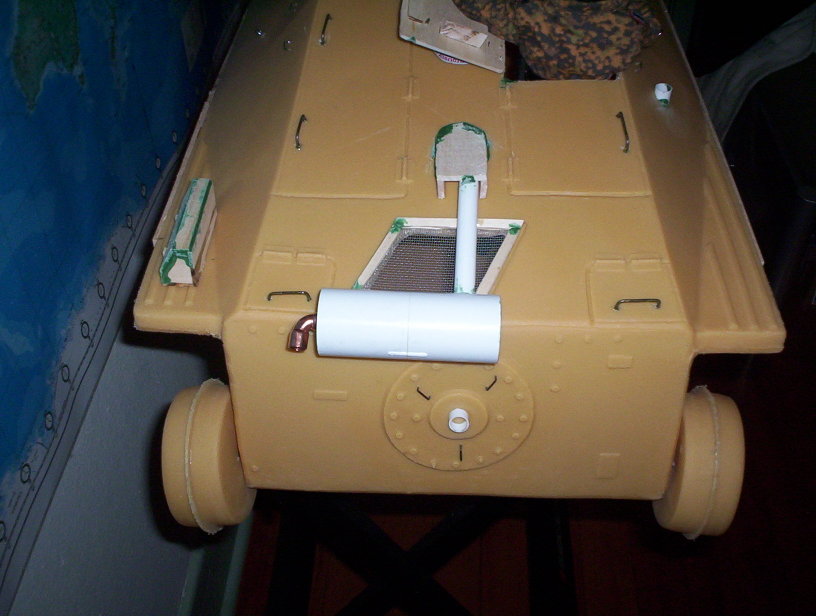
What I have learned so far about working with the DeSimone Hetzer:
-Cyanoacrylate (Krazy
Glue type) adhesive doesn't work very well with this plastic. I have had good success with Gorilla Glue and Devcon 5-minute
Epoxy. I have attached various details made of hard and soft wood, aluminum, resin, stainless steel, and PVC using both of
these adhesives and it worked for all of them.
-the plastic holds wood screws pretty well, which is what I used to
fasten the hinges for the working hatch.
-Spring for the Armorpax MG34 mount. It ain't cheap, but it sure looks awesome!
-For making details, buy a 1/72, 1/48, or 1/35 version model of the Hetzer and measure the pieces then scale up to
1/6. This technique really helps the scratch-building process.
|


